Sunday, December 25, 2011

Christmas greetings...

MERRY CHRISTMAS


Wishing you Peace, Love and Joy from my kitchen to yours!

Friday, December 16, 2011

Snowflake Cookies


It seems like I've been working on these all week.  It's actually not far from the truth....


In early November I made sunflowers.  It took me awhile to get them all decorated.  Then, when I finally decided to take them to work with me, it snowed.  Suddenly, even though it wasn't even Thanksgiving yet, they no longer seemed appropriate.  But our guests didn't care and ate them up in a snap...but I started to think - snowflakes...


So here they are - 32 Snowflakes all decorated and ready to go to work with me tomorrow for our guests to enjoy.

Friday, December 9, 2011

The Long Overdue Post Thanksgiving...Post

Sadly, many of our photos did not turn out and one photo, taken by my niece was not successfully uploaded before it, sadly, got deleted, but here are a few I can share. 

The cornbread stuffing...


The Garlic Mashed Potatoes - a recipe my husband and I came up with together when we were just starting out as a couple...


The Sage Rolls I found in my bread machine cookbook in a hurry when I realized I had forgotten to include rolls in our menu - Yikes!


I also made some wonderful Olive Oil crackers using this recipe I found at 101 Cookbooks and fresh cranberry sauce that came out a bit too tart but still tasty and very pretty.  Here are some final photos:


Thursday, December 8, 2011

Pumpkin Oat Muffins


I really love the foods of fall - apples, cranberries, nuts and pumpkin.  As you may have noticed, I roasted and pureed quite a few pumpkins early this fall.  It seems like fall whips by so quickly every year and that just as I'm getting into the swing of baking and cooking with all that glorious fall bounty, suddenly Christmas is upon us and a whole different list of recipes take center stage.  So forgive me if I'm not quite ready, just yet, to give up on the flavors of fall and jump into Christmas and winter cooking.  I have just a couple more recipes I hope to share before the shift to winter becomes absolutely imperative.  At least I'm secure in the fact that I have tucked away in my freezer several more cups of that wonderful pumpkin and that I'll be able to re-visit fall any time I wish this winter! 


When I put up all that pumpkin, it was with these muffins in mind.  I wanted an oat-based muffin flavored with pumpkin, maple and spices...and here it is.  It turns out that pumpkin does pose something of a challenge in creating a muffin that will rise and produce that classic muffin top, so this recipe may yet need a bit of tweaking, but I'm very happy with the flavor and texture and they've gotten rave reviews from all who have tested them for me.  So here they are, I hope you enjoy them.

Pumpkin Oat Muffins

Preheat oven to 350 degrees.

1 cup pumpkin puree (canned pumpkin is perfectly acceptable)
1/3 cup canola oil
1/2 cup maple syrup
1/2 cup brown sugar
2 eggs,
1 tsp. baking soda*
1 1/2 tsp. baking powder*
1 tsp. cinnamon
1/4 tsp. cloves
1/14 tsp. nutmeg
1/4 tsp. cardamom
1/2 tsp. salt
1 1/2 cups oats
1/2 cup flour
1 cup coarsely chopped pecans

Whisk together pumpkin, oil, maple syrup, sugar and eggs until well blended.  Add baking soda, baking powder, spices and salt.  Stir in oats.  In a small bowl toss nuts with flour, then stir into pumpkin mixture until just combined.  Fill lined muffin tins 3/4 full and bake 15-20 minutes. 

* These muffins did not quite rise as much as I'd like, and I may try adding another 1/2 tsp. each baking soda and baking powder to my next batch to see how that goes.  I'll update this post with the results and let you know.

Wednesday, November 30, 2011

Chocolate-Caramel Thumbprints


Last week, just before Thanksgiving, Amanda & I made those wonderful Salted Caramel Thumbprints that Pillsbury posted (and which I heard about thanks to Callye at www.sweetsugarbelle.com).  They were really delicious, but I wasn't entirely happy with how much they spread out in the oven.  As I was eating them, I came up with the idea to make a dark chocolate version.  This morning, I set out to make them.  As a base recipe, I used Joanne Fluke's Cocoa Snap recipe from her Hannah Swensen mystery series.  I cut the recipe in half and omitted the baking soda (which completely took care of the spreading problem) as well as the granulated sugar for coating.  Her Cocoa Snaps have a wonderful, dark chocolate flavor that I thought would go well with the salted caramel.


One of the things I love about Joanne's cookie recipes is that most of them start with melting the butter.  In this one, you then add the cocoa powder - I used Hershey's Special Dark - and mix it well before adding the sugar.  Starting with melted butter is especially nice for our house since we generally use just wood heat in the cold months so I don't have to wait for hours for my butter to soften.  The melting of the butter does not seem to adversely affect the resulting cookies either, in fact, I tend to prefer chewy cookies and I've found they turn out beautifully using Joanne's method.


We happen to have some family members who really dislike nuts in their cookies so I baked half without nuts and half with.  I used pecans since they are the nut I most associate with thumbprints but also because they are a classic combination with caramel and chocolate (think Turtles). 


The cookies came out with a very nice texture.  Slightly crispy on the outside, dense and fudgy in the middle.  My only dissappointment is that the dark chocolate almost overpowers the caramel.  I think I may also try to come up with a milk-chocolate version and see if I like that better.  However, this base would be ideal with raspberry jelly or maybe some type of cherry topping (like a chocolate-covered cherry). 

Unfortunately, Joanne Fluke does not post her recipes online, but if you hop over to her website http://www.murdershebaked.com/ you will find a list that tells you which book the recipe appears in.  Here is the adapted version I used today:

Chocolate-Caramel Thumbprints:

1 1/2 sticks melted butter
1 Cup cocoa powder
1 Cup brown sugar
2 eggs (one will be separated)
1/2 tsp salt
1 tsp vanilla
1 1/2 Cups flour
approx. 1 cup finely chopped pecans (optional)
13.4 oz. can Dulce de Leche

Preheat oven to 350 degrees.  Melt butter in microwave safe bowl and mix in cocoa until well blended.  Add brown sugar and blend well.  Mix in 1 egg and 1 egg yolk, salt & vanilla.  Stir to combine.  Add flour and mix thoroughly.  Set aside.

In a shallow bowl, beat remaining egg white until slightly foamy.  Set aside.   

Place finely chopped pecans in another shallow bowl.

Using a 1 tsp. cookie scoop, scoop dough and roll into small balls.  Roll in egg white, then nuts and place on a prepared cookie sheet 12 to a sheet.  Using your thumb, gently make a depression in the center of each dough ball. 

Bake for 6 minutes at 350 degrees.  Spoon 1/2 tsp. Dulce de Leche into the depression of each cookie.  Bake 4 minutes more.  Sprinkle with coarse salt and transfer to wire racks to cool.  Makes 4 dozen cookies.

Friday, November 25, 2011

Salted Caramel Thumbprints

I hope you all had a fabulous Thanksgiving Celebration.  We took several photos to share, but they are spread out amongst various cameras and the whole family is spread out right now too (I actually have the house entirely to myself right now - a truly rare occurance!), which means I'll have to save that post for another day.  So in the meantime...

Recently, Callye of www.sweetsugarbelle.com posted a link to a Pillsbury recipe for these Salted Caramel Thumbprints  http://www.pillsburybaking.com/recipes/details/5792. Thumbprints are one of my absolute favorite Christmas cookie and the idea of salted caramel instead of mint or current jelly (that I wouldn't feel I had to save to make for Christmas only) was a combination I knew I just had to try so I printed it out immediately!  This past Wednesday afternoon, my niece-daughter, Amanda and I made them party because I knew I wasn't going to have time to make 2 kinds of pie and...well, mostly I just wanted to try them...  Here's the results:


I promised to share my failures on this blog as well as my successes and while these were by no means and "epic" fail, they aren't entirely a success either.  For the goodthey are delicious!  The recipe calls for using almond extract and I think that's one of the highlights.  Also, I did swap out dulce de leche (thanks Callye) for the caramel topping (which I discovered is just about the best, creamiest, richest caramel ever).  The flavor and texture of these cookies is really great.  Just crunchy enough on the outside, just chewy enough in the middle, and not too sweet thanks to not only the pecans but the salt too. 

For the not-so-good - the recipe is supposed to make 6 dozen cookies we clearly made ours too big because we only made 2 dozen.  I did use my absolute smallest cookie scoop, for the sake of consistency and though it was small enough, but they were way too big and they spread out a lot - so they didn't come out as pretty as I'd like.  

You'll notice the recipe calls for a package of Pillsbury Sugar Cookie Mix (readily available in my local grocery store right now - probably through Christmas, then no more until next Thanksgiving).  I noticed that my favorite Betty Crocker thumbprint cookie recipe (the one I make every Christmas-time) does not call for any baking powder or baking soda & I suspect this has something to do with the spreading of the cookies too - since they spread just like a typical drop cookie would, and those usually call for baking soda, at a minimum. 

My wheels are already turnin' on base recipes I can tweak to make these from scratch in the future.  The sugar cookie flavor (with the almond extract instead of vanilla) does work really well for these and so I'll stick with those flavors, but I'd like to be able to make them without having to rely on the availability of the mix.  I'm already thinking about a different variation too, but I'll keep that under my hat for now, while I go have another cookie! 


Tuesday, November 22, 2011

Sausage-n-Cheddar Potato Soup

I work at a resort in the mountains...  This means winter driving conditions and winter working conditions are part and parcel of my position.  Our guests are the outdoorsy types, hikers, mountain bikers, skiers, snowboarders - if it can be done outdoors, they're into it, so even if I'm not partial to driving in the snow, it's job security.  Unfortunately, like offices the world over, it's drafty in the cold months, hot in the warm months and the doors are constantly being opened as guests, housekeepers and sightseers come in and out.  What does this have to do with potato soup you say?  Well, I find my enthusiasm and appreciation for soup increases directly in proportion to the weather conditions at the resort!

Today, for instance, I pulled in to the resort parking lot and it was raining.  Within minutes, however, it began to snow and proceeded to do so all day long.  By the time I left, my truck had accumulated 3 inches of the fluffy, wet, white stuff.  As I drove home, the lower the elevation got, the wetter it got.  Yep, it was pouring everywhere else!  On nights like this, soup is a moral imperative.  Don't you agree? 

So, tonight I made the potato soup I had been thinking about since last week when I made a tasty pork roast and ended up with cooking liquid that looked good enough to use as stock...and it was so tasty, I just had to share! 


I used red potatoes and sweet, yellow onion.  I chopped up the onion and threw it in the soup pot with some olive oil.  Then I added some mild, bulk Italian sausage.


I chopped up the potatoes into bite-sized pieces and threw them in too.  I let it all cook together a bit, then added some flour...


I stirred the flour in and let it cook for a couple of minutes.


Next, I added the stock and some cream.  Yep, I added cream - and can I just say - YUM!  At this point, I added some salt, pepper, oregano, garlic powder and dried cilantro.  Then I grated some cheddar cheese...


...and threw that into the pot too!  I stirred it in and let it simmer for about 30 minutes.  We had it with some refrigerator crescent rolls - which didn't do it justice, but I was going for quick, easy, hot & hearty - once in awhile, it's ok to cut corners. 


Surprisingly, potato soup is one soup I make that the kids beg me to make.  They absolutely love it.  In fact, we only had one serving left tonight after dinner (and I'm lookin' forward to having that for my lunch tomorrow)!  It always surprises me that they like it so much - but I'm so glad they do since it's one of the heartiest soups I make. It's still stormy & rainy outside and I'm still warm and toasty, hours after dinner.. 

I didn't measure anything when I made this soup tonight (and I usually don't), and sometimes I bake the potatoes first and include bacon (and chives or shallots), and sometimes I don't include meat at all but here's a rough recipe for you.

Potato Soup

1 small or 1/2 large onion
1 lb. mild Italian Sausage, or sausage of your choice
5 or 6 medium to large potatoes
2 - 4 cups stock
1 pint whipping cream, half-n-half or milk to taste
1 cup shredded cheddar cheese
salt & pepper to taste
1/4 tsp garlic powder
dash of paprika
1 tsp dried cilantro

Enjoy!


Sunday, November 13, 2011

Homemade Granola


I've never been a big breakfast eater - at least, not in the sense of getting out of bed and being ready to eat right away.  My day job is about an hours drive away and several days a week, I leave extra early in order to deliver my kids to their bus stop for school (which is 1.3 miles from our house since we live in the toolies...), so I end up spending about 90 minutes in the car before arriving at the office and I'm usually ready to eat by then, so I like to "brown bag" my breakfast as well as my lunch (a necessity since there is absolutely nowhere to go out for lunch).  I really enjoy breakfast foods: eggs & bacon (or ham or sausage), pancakes, waffles, bagels with cream cheese & smoked salmon, cream of wheat or oatmeal and I'm a big fan of granola.   I love granola that has lots of nuts - I'm especially fond of pecans and almonds but I also enjoy pumpkin seeds, walnuts and sunflower seeds in it - the chunkier the better.  Until recently, I hadn't had any luck getting nuggety, chunky granola.  My granola would have great flavor and be loaded with my favorite nuts and seeds, but it would be like individual pieces of lots of ingredients.  I often pack cereal to eat dry while I work and chunky granola is a great choice. 

I also like glazed or candied nuts and that is how I came up with the method I now use to make granola.  I was searching the internet for glazed nut recipes and I kept finding recipes that called for toasting the nuts in the oven, then making a syrup on the stovetop, pouring the toasted nuts into the syrup and, finally, baking the whole thing one more time - and they always came out great!  So I though, why not do the same with granola?  It worked!  So here is the "recipe" I've come up with, of course you can add other ingredients, different nuts, etc.  If you'd like to include dried fruit too, I'd recommend adding it either just before baking - so it sticks to the rest of the mixture or I've simply added it after baking.  If you add it after baking, it won't over bake, but it will also never really stick to to the granola nuggets - exercise your own preferences:

Granola

1 cup coconut, unsweetened works best
3 cups oats
1 cup almonds
1 cup pecans
1 cup walnuts
1/4 cup canola oil or butter
1/4 cup maple syrup or honey
1/4 cup brown sugar
1 tsp. cinnamon, optional
1/4 tsp. ground nutmeg, optional
1/4 tsp. ground cardamom, optional

Preheat oven to 300 degrees.  Toast nuts on a baking sheet or roasting pan until centers of the nuts are golden brown 10-15 minutes.  Toast coconut on baking sheet until light golden brown - watch it closely as it burns easily 5-10 minutes.  Toast oats on baking sheet about 10 minutes.  Combine toasted nuts, coconut & oats, set aside.

In a large saucepan or dutch oven, heat oil (or melt butter), syrup (or honey) and brown sugar until sugar is dissolved and it comes to a boil and reduces slightly.  Add spices and stir to incorporate.  Pour in toasted dry ingredients and stir until coated and all liquid has evaporated.  Remove from heat and pour into a roasting pan or baking sheet.  Bake 10-15 minutes - until browned just a bit more.  Set aside to cool.  Break into pieces once cool and store in an airtight container.

Friday, November 4, 2011

Pumpkin Puree

I've been finding, visiting and reading lots of new blogs in the past  week or so.

Recently, FoodComaBlog.com posted a lovely recipe for Butternut Squash Soup and as I was reading the comments, took particular note of a reader tip on how to best prepare the squash for pureeing, it sounded so slick I decided to try it myself with pumpkins and it worked out so well I wanted to share it with you.


To start off, I sliced the tops of the pumkins off, just like you would for Halloween carving.  Then I scooped out the seeds and pulp.  Our chickens happily eat the pulp, skin and any other pumpkin bits we give them, so the pulp went into the chicken bowl...


The seeds went right into a sieve all set to be rinsed and toasted. 


Then I split the pumpkins in half...


 ...put them in a roasting pan with just a bit of water in it and baked them at 350 degrees for about 30 minutes, until they were fork tender.  They were soft enough to scoop out with a soup spoon.  From there I just put them in my blender and pureed them, then measured 1 cup increments into zip-close bags and froze them for later use! 


Wednesday, October 19, 2011

Cooking With Girl Scouts

I have a long history with Girl Scouting.  I first joined when I was in the 4th grade and I continued to be active in scouting right up until I graduated from high school.  I always planned that if I had a daughter, I'd become a Girl Scout Leader.  When it became clear that pregnancy wasn't in the cards for me, my husband and I started looking into Foster care or adoption.  But again, something else was in the works for us and just as we finished our Foster Parent training, my husbands niece asked us if we'd take two of her children for a year.  Of course we were happy to so we moved in the two children - brother and sister during the summer.  When school started in the fall, Arynn (then 5), came home with a flyer for a Girl Scout information night and wanted to go.  I was thrilled, we went and I came home having signed up not only Arynn for Daisy Girl Scouts but, myself as a co-leader to boot!  This was the beginning of my adult journey as an Adult Girl Scout.  I have co-lead and lead troops, I have organized events, I have camped, I have trained other adults as leaders, I have hosted sleepovers...the list is fairly long, but I'm sure you get the picture.  We eventually ended up with all 4 of our niece's children moving in with us (3 girls & a young man, then 5, 8, 9 & 12) and we have had many trials and adventures since but about 2 years ago, all 3 girls decided they were done with scouting.  This left me knowing I wanted to still be involved in scouting but not sure what I wanted that to look like.  This fall I ran into a fellow leader and we chatted about her troop's long-standing interest in cooking and I offered to host a cooking workshop here at the house.  So, this past Monday, I had 6 middle-school-aged girl scouts, 2 leaders and an adult assistant here, cooking together, having fun and enjoying a delicious meal!

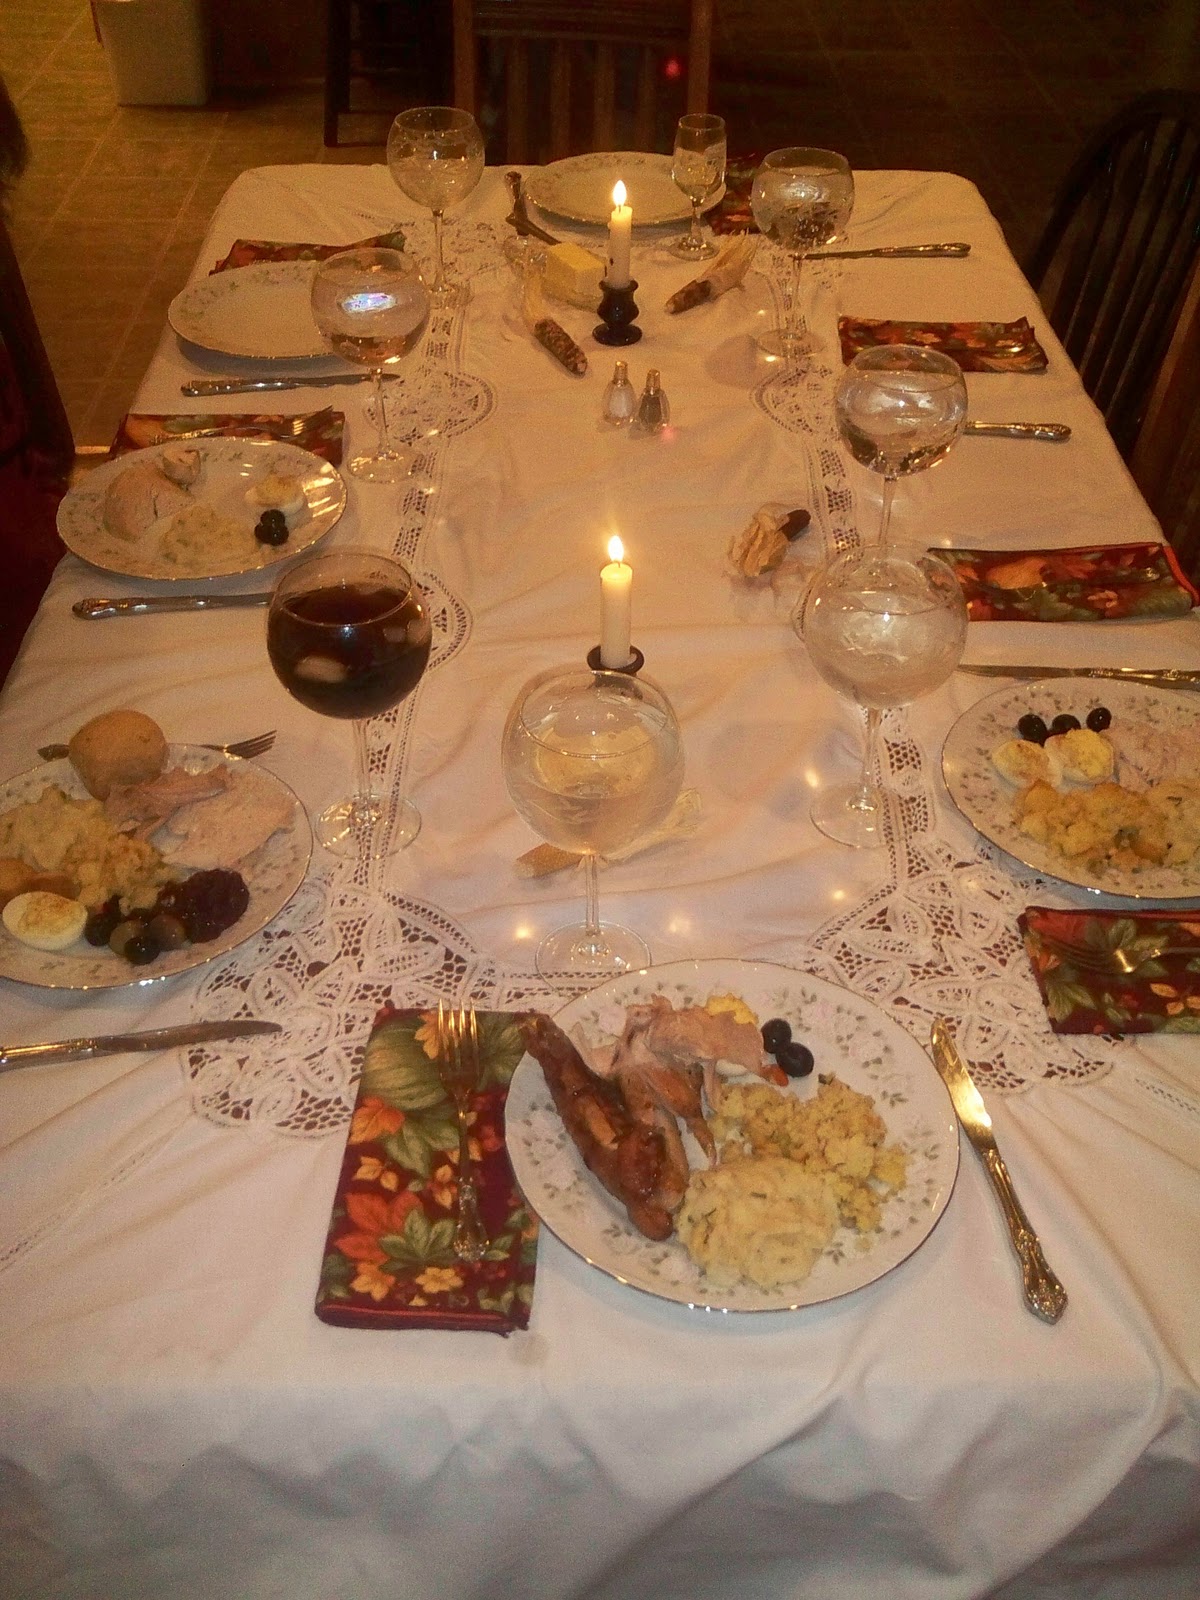
One thing that never fails to surprise me when I cook with a group of kids is the length of time each dish actually takes to prepare.  I never seem to plan for quite enough time - although we managed to have dinner by about 6:30 (and they had cleaned up and cleared out by 7:30).  Each dish you make will take a minimum of 3 times longer that it would take you to make it yourself.  So plan carefully.  Luckily, the lasagna was the only dish that was labor intensive, everything else was pretty simple and easy.  The key for us was to get cracking the minute the girls walked in the door. 

Have a menu, recipes and an order pre-set and printed out for the group to consult if they wish.  I printed up the menu and "order of the kitchen" on one page, then printed the recipes on separate pages & sent the recipes home with the leader to copy for any troop members that wanted them. 

We did a great job of following the order - which kept us on track and ensured that the butter was soft when we were ready to make our garlic butter and the puff pastry sheets already thawed when we needed them. 

Again, most of our recipes were pretty simple.  For the garlic bread, we made garlic butter by roasting a head of garlic in the oven (don't you just love that smell) and mixing the roasted garlic with softened butter, then spread it on a couple loaves of french bread which we put into the oven during the last 15 minutes the lasagna baked.  For the Caesar salad, we used bottled dressing & store-bought croutons so all the girls had to do was cut up a few heads of romaine, shred some Parmesan, dress the salad and toss in the croutons.  Sticking to a menu where they only have to prepare and cook a couple items is a great way to go.  I'd love to have them make their own croutons some time, but with something like lasagna to make it's probably not the best time to make your own. 

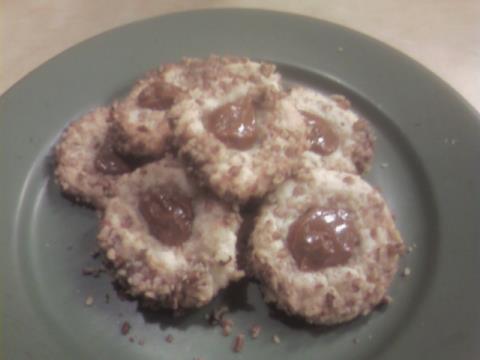
We had Minute Apple Tart for dessert - a recipe by Linda Larsen that I found a About.com.  The apples for the tart needed to be sliced paper thin, so I did have the adults did do the slicing for that.  I'm sure the girls could have done it, but the whole group was getting pretty hungry (and squirrely) by the time we were preparing them so we had to send them outside for some "wiggle time" and it was the perfect opportunity to have the adults do some power chopping.  For safety, I think that's a good time to step in anyway.

The great thing about working with Girl Scouts is they have a wonderful energy.  It's really very satisfying, on a personally level, to know you're teaching them something they can really use.  For many young people, this is the only time they will be taught to cook.  Also, Girl Scouts always clean up - one of their basic precepts is to "leave it better than when you found it" - so they do a great job and you'll likely not even be able to tell they were there, cooking in your kitchen, except for any yummy leftovers that may have been left behind!

Lasagna

Spaghetti Sauce (make the day before, if you possible):
1 lb Italian sausage, bulk or links (hamburger or ground turkey will work too)
1 12 oz can tomato paste
1 20 oz can crushed tomatoes
1 20 oz can tomato sauce
1 onion, coarsely chopped
3 cloves garlic, sliced
2 palmfuls oregano
2 palmfuls basil
1/2 palmful parsley
salt & pepper to taste

For the layers:
Lasagna Noodles 1 8.8 oz. box, I prefer the oven-ready type
Ricotta Cheese, 16 oz
2 lb. Mozzarella Cheese
8 oz. Grated Parmesan Cheese (or less if you grate it fresh as you go)
Nutmeg

Preheat oven to 375 degrees.  Spray an 9 x 13 baking dish with non-stick spray.  Distribute a thin, even layer of spaghetti sauce into the bottom of the baking dish.  Cover with a layer of noodles.  Spread noodles with a layer of Ricotta Cheese.  Grate a little nutmeg over the Ricotta.  Layer with mozzarella cheese & sprinkle with Parmesan.  Cover with a layer of sauce.  Repeat.  Finish with one more layer of noodles and top with sauce, then a layer a mozzarella leaving some of the sauce visible.  Sprinkle with Parmesan cheese.  Cover with foil and bake 30-45 minutes.  The cheese should be melted and the whole casserole bubbly.  Remove foil and bake another 10-15 minutes, until cheese on top is golden brown.  Allow Lasagna to sit about 5 minutes prior to cutting, this will help it to hold together for serving.  Mangia!

Note:  It is absolutely unnecessary to pre-cook lasagna noodles.  You can use any variety of lasagna noodles, they do not have to be "oven ready" - they will come out perfectly al-dente if you do not pre-cook them.

Saturday, October 8, 2011

Cooking with Fresh Pumpkins

With Halloween on it's way later this month the local stores and produce stands are loading up on pumpkins.  I picked up a couple of sugar pumpkins earlier this week and I'm planning on pureeing them, then freezing them so I can use them for pies & other baked goods later this fall and winter.  If you're not familiar with sugar pumpkins, they are a typically smaller variety of pumpkin with an especially thick flesh that makes them an extremely poor choice for carving but an excellent choice for cooking.  The flesh is also sweeter than that of your typical carving pumpkin.  We used to grow them when we had a garden, but we really haven't been gardening for a few years now (long story perhaps to share another day). 

In the past I've either boiled or baked the pumpkin and I haven't been particularly happy with either choice.  Boiling the pumpkin tends to result in a watery and less tasty puree than baking, but baking seems to result in hard, crusty spots on the surface of the pumpkin flesh that doesn't puree very well.

So today, I'm asking for your help.  What is your favorite method of preparing pumpkin for preserving?  Do you freeze the results, or can them?  I'm looking forward to hearing your comments, thoughts and ideas - and feel free to share your favorite fresh pumpkin recipes too!

Thursday, September 29, 2011

Nature's Candy

Several years ago, before Steven & I were married, we would head over to Eastern Washington to visit with my aunt and uncle every fall and visit the local fruit & produce stands.  We would return from these trips with boxes of tomatoes, peaches and apples, bags of onions and smaller quantities of fresh bell peppers, cucumbers or whatever looked good the day we were at the market.  My mother-in-law would can the tomatoes and peaches and we'd split the apples and onions with them and just enjoy fresh apples to munch on and an abundant supply of really good onions for our soups (French Onion is one of our favorites, I'll share the recipe later this fall), stews, sauces and casseroles all winter long. 

At that time, my Aunt Linda & Uncle Len lived on a small farm.  They had chickens & ducks, a large garden and lots of fruit trees.  Amongst their fruit trees were Italian Plum trees and they would dehydrate their harvest, then vacuum pack the dried plums in jars.  They shared some with us on one of our visits and the dried plums became an instant favorite of ours.  The dehydrating process, as many of you are probably aware of, concentrates the natural sugars in the fruit and seals it inside, resulting in something Steven & I like to refer to as Nature's Candy! 

So it's no wonder that once we were ready to plant fruit trees of our own, we agreed we must have at least one Italian Plum tree.  We planted several apple trees, a pear tree, a cherry tree, several hazelnut trees, a couple almond trees and a couple other fruit trees (that never produced  thing).  For years, our apple & hazelnut trees have been our main producers, but the plum tree has been producing more & more plums as it has matured and this year we've hit the proverbial mother lode!  Our youngest niece-daughter, Amanda, started picking the plums last weekend and we have been wasting no time in splitting them open, removing the pits and putting them right into the dehydrator.  As of this morning, we have now filled our dehydrator with plums 3 times - we're talking 6 layers of trays folks - and we still have enough plums to fill it at least once more - probably twice! 

These plums are so small - most are about the size cherry tomatoes - that we've really only eaten them by the handful and/or dried them.  I would like to know if anyone out there has ever canned Italian plums or made preserves from them? 

If you have the opportunity, definitely pick up some Italian Plums and make Nature's Candy, I'm sure you'll fall in love too!

Sunday, September 25, 2011

"Snacky" Dinner

As much as I love to cook (and eat!), there are nights when I just don't want to work at making dinner.  Particularly on the warmer summer days when I don't want to heat up the kitchen, or at the end of an especially stressful work week, I just want easy, easy, easy.  Often times, the temperature of the meal is as much a deciding factor as the work involved - for instance if I'm in the mood to fix a meal, but jut want something cool and refreshing, I might throw together a salad for dinner - taco salad and greek salad are always favorites in our house, or we might have deli-style sandwiches on crusty rolls.  Then there is "Snacky Dinner".  Steven & I have always been fans of what I really think of as an indoor picnic - olives, rustic bread, an assortment of cheeses, fresh fruit, wine and some Pacific Northwest alder smoked salmon or a nice hunk of salami. 

Sometimes we enjoy an assortment of finger foods that can be eaten in front of the TV so we can enjoy a movie marathon or at the game table during family game-night (something we are LONG overdue for).  These might include appetizers that I make for parties like tortilla roll-ups, or taco bites (won-ton skins filled with a taco-like filling - I'll post the recipe another time) or other party-type foods like chicken wings, homemade artichoke-jalapeno dip with chips, nachos, sausage rolls or a deli-meats and cheese platter set out with  assorted cocktail breads and condiments like mayo or mustard. 

I remember Steven & I attempting to introduce these as "snack meals", more like something you'd enjoy at a party.  You assemble a little plate of goodies, nibble on them while playing cards ot mingling with guests, then later, you might assemble another plate with a few more items - just nibbling as you go, rather than filling a plate and eating non-stop until you're stuffed. This concept has never really caught on with our children, they enjoy the food (very mucy, in fact), but they just feel compelled eat until they are satisified, all in one go, so in our house if there's something you especially enjoy, you better move quick before the kids finish it off! 

Somewhere along the lines our "picnic" meal of bread, cheese, fruit, etc. was christened "Snacky Dinner".  If our youngest, Amanda, sees a loaf of bread and some cheese out near dinner time, she immediately announces we're having "Snacky Dinner".  It's a meal that is always greeted with much enthusiasm.  There's plenty of room for you to add your own twist and I find it's nice to know that my family is really just as happy with such a simple meal as a more complex one that requires real attention at the stove!

Sunday, September 18, 2011

Baked Potato Soup

It's a very rare occasion that Steven, my husband, requests anything specific for dinner.  He's very easy going when it comes to meal time - he can take it or leave it, pbj it or gourmet it.  He always appreciates anything I make - even if it's less than my best effort (there's good reason I fell in love with & married this man!).  So, of course, when he does request something, I'm happy to oblige!

Friday night we attended a high school football game in Tacoma.  It was a fun, in house rivalry for us since our 15 year old's school was playing Steven's alma mater.  It was pretty chilly though and by the time we headed home we were all human popsicles so Steven's suggestion of soup - specifically potato soup - for dinner Saturday night sounded ideal!  We stopped at the store on the way home and I found some lovely, small to medium sized golden potatoes and picked up the rest of the item I would need to complete the meal.

Saturday evening rolled around and I decided to approach the soup a bit differently than I had in the past.  I really like to bake the potatoes, then put them in the soup for that lovely baked potato flavor but I wanted to try roasting the potatoes instead and see how that would turn out.  I was just about to put the potatoes in the oven when Steven announced we was going to play poker with his friends - just as well, I thought - I knew it would hurt the soup any to be made ahead and heated Sunday - in fact, it would probably make it that much better, so I continued on with making the soup.

We had it tonight for dinner & it was the thickest, heartiest potato soup I've made to date!  The potatoes were tender, the soup was thick, rich and ultra-filling - none of us could eat more than one bowl!  We had a simple spinach salad - just spinach and hard-boiled egg with it as well as shredded cheddar cheese, chives and light sour cream to top the soup.

Potato Soup
about 12 small-medium potatoes
4 strips of bacon, cut into small pieces
1/2 sweet onion, coarsely chopped
4 cups chicken stock
1 pint half & half
salt & pepper to taste

Preheat oven to 425 degrees.  Cut potatoes into 1/2 or 1/4's depending on their size, so they are about 1 inch wedges.  Place in a roasting pan, sprinkle with salt & pepper and drizzle with olive oil.  Toss to coat potatoes thoroughly.  Bake until nicely browned - about 30-40 minutes and set aside to cool.

Place a dutch oven on the stove top at med-med. high heat and allow it to preheat while you chop the bacon.  Cut the strips in 1/2 lengthwise, then slice into pieces.  Cook bacon in dutch oven until browned on one side, add onions and continue cooking until bacon is evenly crisp and onions are translucent, stirring occasionally.  Add about 2 tablespoons of flour stirring well, and let it cook about 2 minutes.  Reserve about 1 cup of the roasted potatoes and mash the rest right in the roasting pan.  (you may need to cut up the skins a bit with a knife)  Add the mashed potatoes to the dutch oven and stir well.  Add chicken stock and half-n-half.  Cube up reserved potatoes and add to soup pot.  Allow it all to come to a boil, stirring occasionally, then turn down to a simmer and allow it all to heat through or you can turn it off at the point and store it in the refrigerator over night.  Salt & pepper to taste.

Serve hot with shredded cheddar cheese, chopped chives (scallions will work too) and sour cream.

Friday, September 16, 2011

It Always Comes Back to Food

I'm currently reading "A Homemade Life" by Molly Wizenburg (and I'm loving it).  It's a lovely collection of stories about Molly, her family & friends and food - including recipes.  One of the joys I'm finding in reading this particular book is the discovery that mine is not the only family who's family memories revolve around food!  Whenever we talk about get togethers, vacations, etc., food is always involved. 

For instance, I can remember a trip I took with my parents to California to visit my Aunt & Uncle and my then baby cousin.  It's the first road trip I really took with them without my sister and brother along.  The funny thing is, the majority of my memories of this trip revolve around food - I can remember 3 different restaurants (although, sadly, not their names) & what I ate at each one! 

We always seemed to land in Redding, CA our first night on any road trip to California and this trip was no exception. That first morning heading out of Redding, we decided to hit the road and grab breakfast somewhere along the way.  We ended up on this funky dirt road (that I think was supposed to be a short cut) which eventually lead us to a very small town whose name I cannot even remember.  We discovered a steak house that looked popular & happened to serve breakfast so we pulled in.  It had a Red Baron theme, including drawings of bi-planes on the paper placemats.  Although I no longer remember what Mom or Dad ordered, I still have full recollection of the fantastic strawberry pancakes that I ordered.  They were as big as my plate, smothered in beautiful, fresh strawberries and topped with my all-time favorite, whipped cream!  The pancakes were a perfect, golden brown on the outside and moist and fluffy on the inside.  YUM!

We moved on and ended up in Fort Bragg, California (that same night, I think).  We stayed at a motel with a view of the ocean and I'm sure we must have spent a bit of time on the beach, but again, it's the meal we had there that I remember most.  Mom & Dad chose a lovely seafood restaurant overlooking the ocean.  I've always liked steamed clams (my aunt & uncle who live on Whidbey Island used to have amazing clambakes at their place) and this restaurant had clams steamed in a champagne and herb sauce.  They were wonderful, tender morsels of clams served with melted butter, of course, and lovely, crusty sourdough bread.  I think of that dinner every time I watch "Pretty Woman" - you know the scene where Vivian is having dinner in a fancy restaurant with Edward and his business associates and she sends an escargot flying?  - well, I was attempting to remove a particularly stubborn clam from it's shell and fling went my fork, zing went the clam to land somewhere on the floor near my chair!  I was mortified!  Of course, my first instinct was to chase it, pick it up and discard it, but my mother said "Don't even think about it!" and assured me it must happen with some regularity and suggested that we just let the wait staff know upon our departure.  Which we did - and all was well.

My final food-related memory of that trip was of my first taste of Red Snapper.  Growing up in the Pacific Northwest, we've always eaten plenty of fish.  I think at this point in my life (I must've been 13 or so at the time) I had eaten salmon, halibut, the aforementioned clams, oysters, crab, shrimp, trout, steelhead and who knows what else, but I had never tasted Red Snapper.  On the way home, we stayed at a lovely place at Lake Shasta - I remember wishing we could stay one more day to enjoy the resort-setting, but we had a pretty tight timeline on the trip back.  We had dinner in the restaurant that was part of the resort where we stayed.  I ordered the Red Snapper - I don't remember anything, really, about the specific preparation, but I do remember enjoying it thoroughly!  Red Snapper became a favorite of mine for awhile after that and I would often order it when I had the opportunity.

It seems every family gathering involves dinner or lunch, potluck or BBQ.  Of course we need fuel to live, and we all know it's not healthy to "live to eat", but wouldn't life be so much more mundane without those wonderful surprises like a perfectly steamed bucket of clams, a light & fluffy pancake or that first taste of something new?  Our family has been talking about a get-together in October to celebrate all the fall birthdays and, yep, you guessed it, we've already talked about what to fix for dinner!  It's true, it really does always come back to food!

Monday, September 12, 2011

Ina Garten's Roasted Shrimp & Orzo Salad

I picked up a new recipe recently while watching an episode of the Barefoot Contessa.  About a week ago, I decided to try the recipe for the first time - just off the top of my head.  I managed to just about duplicate it, but I did make one minor change.  The recipe was for Roasted Shrimp and Orzo salad and called for cucumbers, amongst the other ingredients.  Rather than purchasing cucs, I decided to use some zucchini I already had on hand and - and this is the inspired part - I had my husband grill the zucchini.  Steven said the zucchini really made the salad - it was his favorite part.  It's a really tasty dish & can be treated as a salad or a side dish.  We've eaten it cold so far, but I'm sure it would be tasty warm too. 

Here's the link to the recipe - try it, it's so delicious that when I decided to take it to the family reunion for my potluck contribution, he said I should but a warning on it that eating it may cause "orgasm" - yes, he really said that!  http://www.foodnetwork.com/recipes/ina-garten/roasted-shrimp-and-orzo-recipe/index.html

The weather has been fairly hot here lately (for the Pacific Northwest anyway), and I haven't really wanted to heat up the house by turning on the oven, so I did cook the shrimp in my cast iron skillet - they were delicious, but I've tried Ina's oven roasting method too - and they are especally yummy prepared that way.

It's really best to prepare a day in advance, we both thought it was at it's best the next day and it's held up well enough for us to pack it in our lunches for a couple days following. 

Saturday, September 3, 2011

Fish Tacos - Perfect Summer Fare!

I picked up some lovely, fresh cod at the grocery store the other day and decided we'd have fish tacos.  The kids aren't big on fish though and since they headed to Grandma's house for a visit yesterday, I decided to fix the fish tacos last night. 

I really like dill, cumin, coriander and fresh lime juice on white fish so that's what I used last night, plus salt & pepper and a bit of olive oil.  I prepped the fish, then baked it in the oven - no breading, no frying.  I baked it at 375 degrees (f) for about 15-20 minutes.  It came out moist and delicious! 

For toppings, I'm not big on the traditional cabbage, so I just shredded up some romaine lettuce instead. I also cut up some fresh zucchini into matchstick-sized pieces and cut a lime into wedges and made some fresh tartar sauce. 

Tartar Sauce:
1/4 c light sour cream or greek yogurt
zest of 1 lime
juice of 1/2 - 1 lime
1 tbls capers, chopped
1 tbls. dill (fresh is best, if you can get it)
1/2 tsp. coriander
1 tsp. cumin
salt & pepper to taste

Stir it all together and Chill while the fish is baking.

I found some lovely corn tortillas at the store that were really soft & "hand-made style" - they were a bit thicker and a lot moister than the usual corn tortillas - and healthier too.  The zucchini added a nice crunch and their mild flavor allowed the fish to remain the star. We also had a lovely spinach salad with honey-mustard dressing to balance out the meal.  My husband enjoyed this delicious, light and healthy meal so much, he had a 2nd helping!

Saturday, August 6, 2011

Queso Fundido!

Queso Fundido is a delicous, melted cheese appetizer.  I've been playing around with devising my own recipe and I think I've finally come up with "my recipe"!  Here it is, I hope you give it a try and enjoy it as much as we did (even my pickiest eater enjoyed this one):

approx. 1 lb Chorizo (I found bulk Chorizo at my local grocery store)
8 oz. cream cheese, room temperature
8 oz. Queso Quesadilla Cheese (cheddar, aged monterey jack or pepper jack would be good too), grated
1/2 large or 1 small onion, chopped
1 red bell pepper, chopped
2 tbls sour cream
juice of 1 lime

Preheat oven to 400 degrees.

In a cast-iron (or oven-proof) skillet brown the Chorizo.  Add the chopped onion and bell pepper & saute until Chorizo is browned and the onions are transparent.  Cut cream cheese into chunks and add to chorizo, veggie mixture.  Turn off eat and allow to sit for about 1 minute.  Stir until cream cheese is well combined with chorizo mixture.  Add grated cheese, sour cream and the lime juice and stir until all is well blended (it's ok if the cheese hasn't melted fully).  Place skillet in preheated oven and bake about 10-15 minutes until cheese is bubbly (I like it a bit browned on top too).  Serve hot with tortilla chips.

The chorizo added just enough spice for our family, but if you prefer it spicier you could certainly add a couple of hot jalapeno or other hot peppers.  I have made Queso without chorizo and that is tasty too!

Thursday, July 21, 2011

Mushroom & Goat Cheese Pizzetta

I was fortunate enough, recently, to receive some wonderful wild mushrooms from a friend who gathers them and then cans her harvest.  I have to admit, I've been hoarding them.  They are an extra-special treat and I knew right away I wanted to use them for a really special pizza or pizzetta.  Our Godson recently arrived to spend the summer with us, so a couple nights after he arrived, when the weather was beautiful, we BBQ'd some steaks and I decided to grill some pizzetta to go along with it!  To cut corners, I picked up some "pocketless" pita.  Then I warmed some olive oil in a small saucepan and dropped in several cloves of coarsley chopped garlic as well as some fresh rosemary & thyme.  I let them all steep together, then brushed a couple rounds of the pita with it, being sure to include the herbs and garlic.  I topped them with some sliced red bell pepper (I would have preferred roasted, but the fresh worked out fine), 1 can of the wild mushrooms, drained and some goat cheese.  We threw them on the grill - a bit to the side where the heat wasn't as hot.  We covered them with the lid to a sturdy pot to trap in the heat & melt the cheese.  They came out utterly delicious! 

Ciao!

Thursday, June 30, 2011

Italian Sandwich

Often when the kids are away on an overnight at a friends or for their visits with their Mom, I'll splurge a little and make something using a bit more expensive ingredients or ingredients we don't eat as often because the kids don't really like them.   Many times, I've made Italian sandwiches for Steven and I using ingredients like prosciutto or coppa and fresh mozzarella or good quality provolone.  This week, I planned ahead and did just that, but I went the extra mile and used home-made focaccia rolls, roasted red peppers and olive spread.  

For the focaccia, I simply use my pizza dough recipe.  When I make pizza dough, I just throw all the ingredients in my bread machine and set it on the "dough" setting.  It does all the mixing & kneading for me.  For the focaccia, once the dough was ready I divided the dough in half and put half in a zip-lock bag in the fridge for pizza tonight.  Then I divided the remaining dough into quarters and formed them into flat rounds.  I prepared a baking sheet with a coating of olive oil and a liberal sprinkling of salt (both Steven & I feel the dough is bland if it's not salted top & bottom).  Place the dough rounds on the sheet so they are not touching.  Brush with olive oil and any herbs you wish.  For mine, I heated up some EVOO in a small sauce pan, then added a few cloves of sliced garlic and some dried oregano (I prefer fresh herbs, but this is what I had on hand).  Bake at 375 for about 20 minutes.  The top and bottom of each roll should be a nice, golden brown.  Set aside.  

For the olive spread, I started with some olives I had chopped up into a tepenade a few days earlier.  It consisted of garlic stuffed, sicilian style olives, pimento stuffed Spanish olives and ripe olives.  To about 2 tbls. olive tepenade, I added a couple spoonfuls of mayo, 2 small cloves grated garlic, about 1 tbls. grated onion and a bit of EVOO just to thin it enough to spread easily.  

If you've never roasted a red bell pepper before, it's amazingly easy.  I put mine in a cast iron skillet.  Drizzled on a bit of EVOO, then spread it with my hands so the pepper was fully coated.  Placed in a cool oven (preheated just wasn't necessary, but you can if you want to) and turned it on to 425.  Just let it roast until it's charred all over - you don't even have to turn it.  The house smells heavenly while it's roasting, but do turn on a fan prior to opening the oven or your likely to set off your smoke alarm.  When you remove the pepper from the oven, transfer it to a glass bowl and cover it tightly with saran wrap.  Just set it aside and let it cool.  Once it's cool you can peel the skin off very easily.  Then remove the stem and seeds.  Set it aside.

The Italian Sandwich

salami, thinly sliced
prosciutto, thinly sliced
fresh mozzarella, sliced
olive spread
fresh basil
roasted red pepper

Split the focaccia rolls in two, horizontally.  Spread bottom half with olive spread. Top with 3 or 4 slices salami and 2 slices prosciutto.  Top with mozarella slices to taste.  Top with fresh basil leaves and slices of roasted red pepper.  Cover with top half of focaccia roll.  Repeat until you have desired number of sandwiches.  If you have a panini grill or other indoor grill, grill the sandwich until the cheese is melted and the sandwich is heated through.  If you do not, you can put them in a cast iron skillet and top them with a 2nd, heavy skillet (or a couple of bricks).  Turn over 1/2 way through or the bottoms will burn and the top half of the sandwich will be cold.  Serve with rustic potato chips and ice cold beer or ale or a nice glass of Italian red wine.  YUM!

Ciao!

Tuesday, June 28, 2011

Spinach Salad w/Honey-Mustard Dressing

So the kids are off to Grandma's for a couple of days and it's just Steven & I.  The weather has been fairly warm, if overcast, and on night's like this we just want to kick back after work and enjoy each other's company over a simple dinner.  Steven's not one to say much about what I cook, he likes my cooking and enjoys everything I fix so I know something is especially good when he says "This salad is really good!", which he did so here's what I did:

Maple Glazed Pecans
Spread 2 cups of pecan halves in a single layer on a cookie sheet.  Place in cold oven & set oven to 350 degrees.  Toast them until the insides start to turn golden brown - about 10-15 minutes. Set aside.  In a medium mixing bowl, measure out 1/2 tsp. salt and 1/4 c. brown sugar.  Mix well.  Set aside.  Cover a baking sheet with parchment or waxed paper - and set this aside too.  Put 1 tbls. butter, 2 tbls. water and 4 tbls. maple syrup in a medium saucepan and bring to a boil over medium heat. Add the pecans and stir to coat, continue to cook until the liquid has evaporated - about 3-5 minutes.    Pour nuts into bowl with salt/sugar mixture and toss until coated.  Spread onto paper covered baking sheet to cool.

Honey-Mustard Dressing
In a small bowl mix together 2 tbls. grainy, dijon mustard, 2 tbls. honey & enough white wine vinegar to make a smooth sauce.  Stream in Extra Virgin Olive Oil until all are well-blended.  Grate in 1 small clove of garlic.  Add salt & pepper to taste. 

Spinach Salad with Honey Mustard Dressing and Maple Glazed Pecans
baby spinach leaves
cucumber, cut in half and sliced (seed it if the seeds are too large)
scallions, chopped (whites and greens)
Honey-Mustard Dressing
Gorgonzola cheese, crumbled (or any blue cheese you prefer)
Maple Glazed Pecans

Put the spinach greens in a bowl, add cucumber & scallions.  Dress with Honey-Mustard Dressing, to taste, and toss.  Top with Blue Cheese and Maple Glazed Pecans - delicious!

You can store the left over pecans in an airtight container - freeze them if you won't use them within a week or two.  The dressing made enough for a couple large salads or several 2 person salads, store any extra in the refrigerator.

I hope you like it!

Saturday, June 25, 2011

Wednesday, June 22, 2011

On a Roll With Honey!

I'm really on a roll baking cooking with honey now!  In the past two days I have made homeade granola, honey-roasted nuts and caramel corn (although not technically carmel, more like poppycock).  YUM!  I found a couple recipes on the internet for honey-roasting nuts and also for granola and those are what I used this time around - making only very minor changes. 

The honey-roasting turned out to be super simple:  Roast the nuts in the oven for about 15 minutes.  On the stovetop, prepare a mixture of oil (I used  buter), honey and water  bring it to a boil and stir it until well blended.  Add the nuts to the pan on the stove and continue to cook until the liquid has evaporated.  Transfer it all to a bowl and toss with sugar & salt.  Spread it out on a wax paper or parchment covered cookie sheet to cool.  So TASTY!

For the granola, I specifically searched recipes for "chunky" granola.  I love granola that is like nuggets that you can snack on as well as eat as cereal, but every recipe I've experimented always came out very loose.  Sadly, the recipe I used did not come out very chunky either, although it was slightly less loose than prior experiments.  It was, however, delicious anyway and I look forward to experimenting with granola some more.

Finally, the candied popcorn.  So simple, so quick and so tasty!  Pop up 3 quarts of popcorn - set aside.  On the stove top, melt 1 stick of butter and add 1/2 cup honey.  Heat and stir until they are well combined.  Pour the butter & honey mixture over the popcorn - I did about 1/2 the popcorn, stirred well, then added the rest of the popcorn, poured more butter and honey mixture and stirred, then added 1 cup almonds and poured the remaining honey/butter mixture.  Stir well, then spread in a thin layer on a cookie sheet.  Put in a 350 degree oven and bake for 10-15 minutes. 

If you have a granola or honey-roasted nuts recipe you'd like to share,  I'd love to hear about it!

Wednesday, June 15, 2011

Getting Sneaky With New Foods

My husband, Steven and I are big rice eaters.  In all honesty, we are big starch fans, bar none.  We love pasta, bread, rice, potatoes - all of it!  When the kids first moved in with us, they thought they didn't like rice and since it's such an affordable grain and a little goes such a long way, I set out to try and show them otherwise.  

I remembered a visit to their grandparents house once when their grandpa had made them pork chops with broccoli rice au gratin (packaged - yuck!) and they were eating it up with no complaints.  So I decided to make my own version.  They had already embraced my mac-n-cheese by then - even though it looked "weird" - so I used the same, inexpensive Velveeta that I use in my mac (I mean really, why not, the kids like it and it works for them?!).  You could certainly dress it up with gourmet cheese, although you may need to make a white sauce base to get the same consistency - but it would be extra-delicious and great for entertaining.

Here's how I did it:

Measure and rinse the rice according to the package directions.  (most types of rice are prepared with 1 part rice to 2 parts water, but I prefer calrose rice which is 3 parts rice to 4 parts water) Cook according to directions or put it in a rice cooker and follow the manufacturers instructions.  While the rice is cooking, cut about 8 ozs. velveeta into 1/4 inch to 1/2 inch cubes (use more cheese for larger batches of rice, less cheese for smaller batches).  Then prepare your fresh broccoli (frozen would work too).  Separate it into florets of whatever size you prefer - I like bite sized pieces.  When the rice is finished cooking, turn off the heat and layer first the cheese, then the broccoli on top of the rice and put the lid back on.  Let it sit about 5 minutes, or while you're completing whatever remaining dinner preparations you need to (setting the table, tossing the salad, etc.).  Remove lid and stir to incorporate all the ingredients.  You may need to add a bit of milk or chicken stock to make it creamy.   Season with Salt & Pepper to taste & serve.

I haven't made this for quite awhile but I still get asked to make it regularly - it has definitely become a family favorite.  

After preparing it for them this way a few times, I started making rice in other ways - for instance, I'd put rice and a can of any kind of beans (rinsed & drained) in the rice cooker along with herbs, spices, onion, etc. and let it all cook together, then serve it with an entree.  

After awhile they were more willing to try it "plain" and now they love it - even without the butter or parmesan cheese which is my favorite way to eat rice!
It is my belief that the key here is to figure out something they do like and incorporated it into your recipes to dress up something they think they don't - in this case the kids just hadn't really eaten rice much prior to living with us - and then mix it up once they've found out they do like it in that particular way.  

I hope you have success with this idea - good luck and happy eating!

Monday, June 13, 2011

What's Up In CJ's Kitchen?

Welcome to my blog - CJ's-Kitchen.  I'll be sharing with you my triumphs, experiments, and yes, even my failures.

What's up in my kitchen?  Plenty!  I've been experimenting lately with substituting honey for sugar in cookie recipes.  I'm planning on selling my baked creations at the local farmer's market this summer. I hope to find there is a market for hand-baked cookies and dream of someday opening up my own shop!

Yesterday, I experimented with a new recipe I've been creating for a granola-inspired cookie.  This is my second attempt - for the first, I modified an oatmeal cookie recipe of my Grandmother's, substituting locally harvested honey for the granulated & brown sugars and adding chunks of coarsely chopped almonds.  Well, the honey flavor was nice but the cookies weren't quite sweet enough and the amount of flour I had to add to offset the added moisture from the honey created a mufin or cake-like texture, although they were a bit dry.  As my family & I analyzed them, I came up with the idea to increase the oatmeal used in the cookies to balance out the moisture content to the point where I would be able to stick with 1 1/2 cups of flour the recipe originally called for.  I also came up with the idea to use a nut-butter - not peanut butter, but almond butter. 

So yesterday, I made a second attempt, now with almond butter & lots more oats.  Still, the cookies were dry, not sweet enough and frankly, a bit bland. I was dissappointed to find the almond butter does not possess the same qualities as it's peanut-counterpart - when you put peanut-butter in a cookie (or anything else, for that matter) you get a very distince and recognizable flavor and quality.  So it's back to the drawing board - my husband suggested trying 1/2 peanut butter 1/2 almond butter and that might be worth trying. 

That's ok, not every kitchen experiment can be a success and I've had more than my share of successes, it's certainly satisfying to come up with your own recipes in the kitchen, to have your family express delight in your creations.

Suggestions anyone?  Please feel free to share your ideas!

Thanks for joining me and I hope you feel inspired to try something new in your kitchen!