Thursday, November 8, 2012

Ghirardelli Chocolate Truffle Cookies with Sea Salt


I love to bake with Ghirardelli chocolate products.  I have been using Ghirardelli chocolate chips for about as long as I can remember.  Their semi-sweet chocolate chips are especially nice to bake with because they hold their shape, but still melt beautifully. 

Recently, someone posted a photo of a beautiful cake on Facebook that was from the Ghirardelli website and in my search through their recipes to find it, I stumbled across this fantastic cookie recipe.  I made them immediately, then made another batch the very next day!  Yes, they are that good! 

Of course, in my typical fashion, I simplified the steps and made them using just one bowl.  What can I say, I'm lazy, I like to bake, but I don't much care for doing dishes afterwards. 

These cookies are wonderfully chocolately, true to their name, they have a gooey, truffley texture and the light sprinkling of salt is just the thing to balance out the sweetness.  Luckily - or perhaps un-luckily depending on your point of view, the batch only makes about 2 dozen (I got 20 cookies from the first batch, 23 from the second batch - same scoop size, go figure!)  so they don't last long.  They'd be great for holiday hostess gifts or teacher gifts or?????  I would use my smallest cookie scoop for that and place them in those cute little mini-muffin papers and box them up like candy... I can tell I'm going to have to make another batch very soon - they are calling to me...


So these cookies start out with melting 60% cacao chips with butter.  I did this all in the microwave. It's not really necessary, but cubed up the butter. Then covered the bowl with plastic wrap and nuked it for 1 minute on high heat...


Remove it from the microwave and give it a stir to see how well it's melted.  Chocolate chips tend to hold their shape as they melt so it's important that you stir it to see how it's coming along... 


You can see these are only just starting to melt after a minute.  I put them back in the microwave and nuked them for 30 seconds at a time, stirring after each interval...


While the chocolate chips and butter were melting in the microwave, I was also toasting walnuts in a dry, cast-iron skillet on low heat.  Once they were toasted, I gave them a rough chop...


Once the chocolate and butter are fully melted you can mix in the sugar.  Let it sit a bit and cool before adding the eggs, then add vanilla, salt and baking powder.


Once that is incorporated, I like to add the flour and top the flour with the baking chips and nuts, this way, they get coated in the flour somewhat as they are mixed in and are less likely to sink to the bottom of your cookie dough so you get a nice, even distribution of nuts and chips throughout your batter. 


It should look like this when it's all mixed together...


Now you cover it back up with the plastic wrap and chill it in the fridge for 10-15 minutes while you're oven is preheating to 350 degrees.


Scoop them...


Then sprinkle them lightly with sea salt...


And bake.  They should look like this when they're done:


You'll want to serve these with plenty of ice-cold milk!
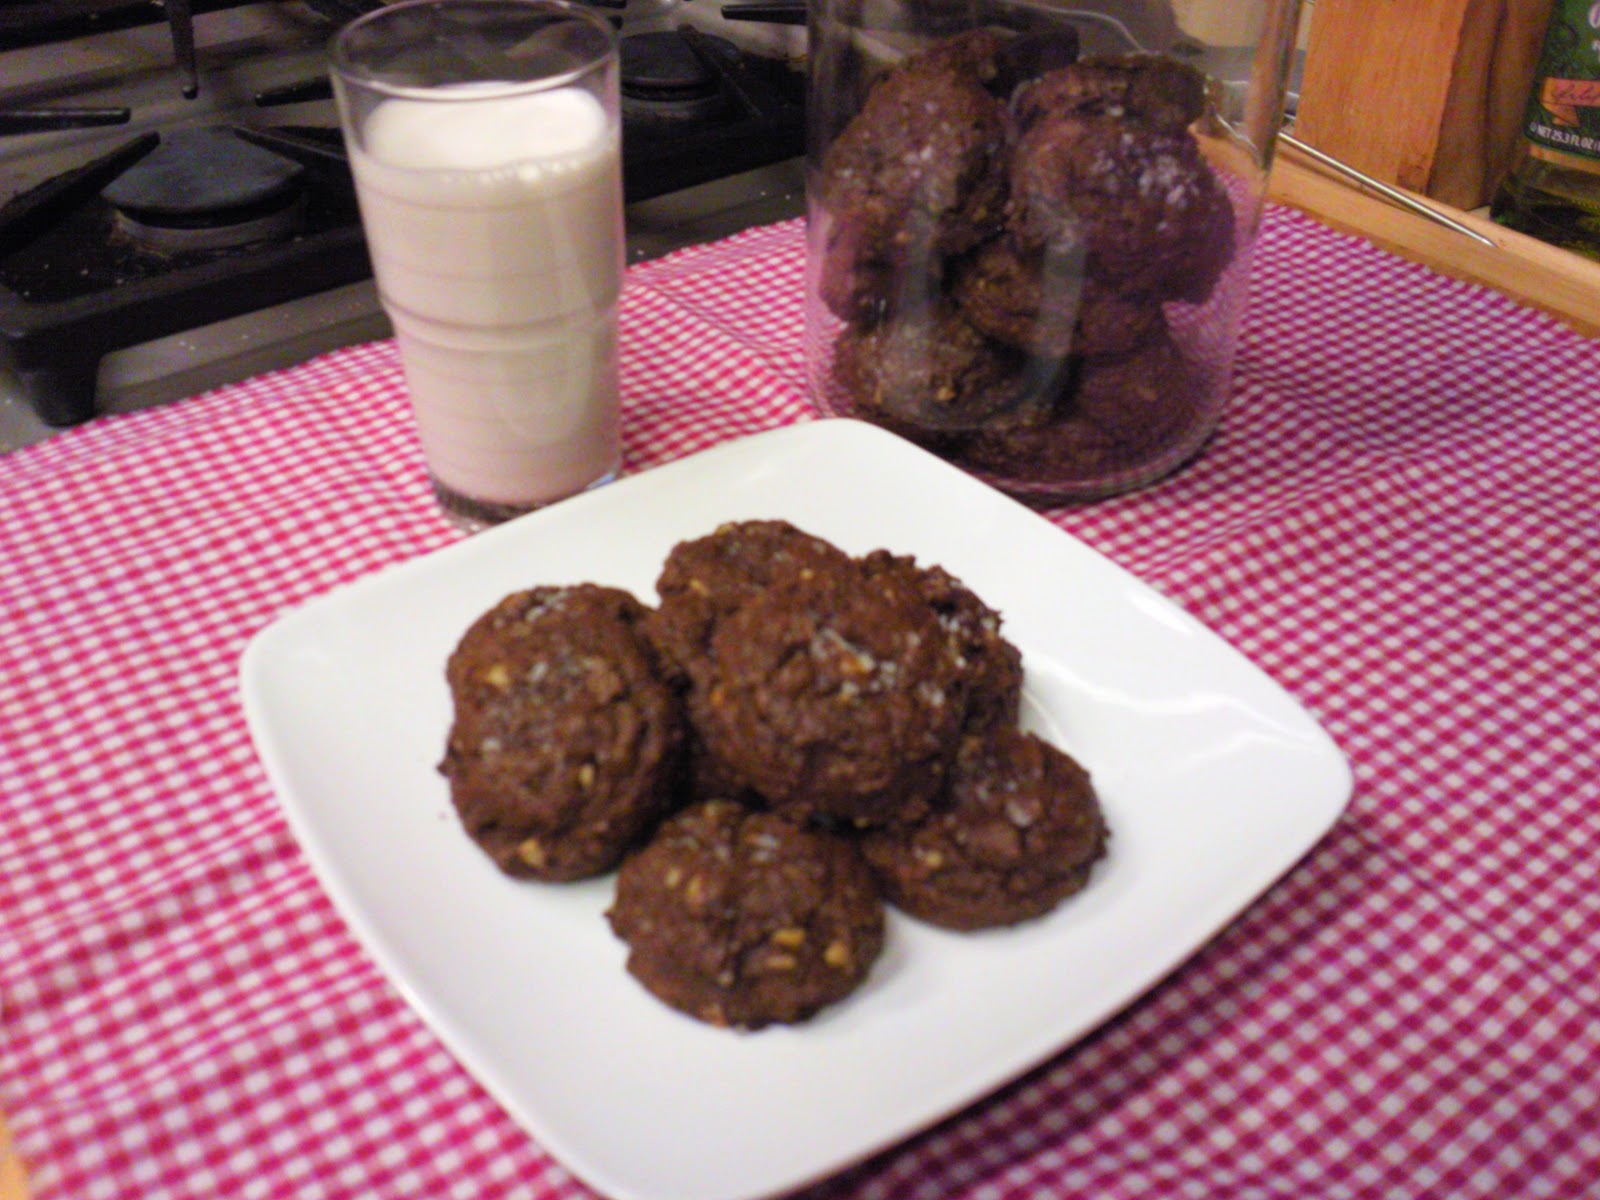

Good luck not eating the whole batch in one sitting!

Ghirardelli Chocolate Truffle Cookies with Sea Salt

Makes 2 dozen. 

2 tablespoons unsalted butter
1 1/2 cups 60% Cacao Baking Chips, these will be melted into the cookie dough
1/2 cup granulated sugar
2 eggs
1 teaspoon vanilla
1/4 teaspoon baking powder
1/4 teaspoon salt (use table salt or kosher salt)
1/4 cup flour
1/3 cup (remainder of package) 60% Cacao Baking Chips, these will be stirred into the batter
2-3 tablespoons coarse sea salt to top the cookies before baking
3/4 cup toasted walnuts or pecans, chopped (optional)

In a large microwaveable bowl, place butter and 1 1/2 cups of the baking chips.  Microwave for 1 minute on high, then stir.  If you cannot stir the mixture smooth, microwave in 30 second intervals stirring after each interval until you can stir the chips and butter into a smooth consistency.  Add sugar.  Allow mixture to cool.  Add eggs.  Stir in vanilla, baking powder and 1/4 teaspoon table salt.  Add flour, remaining baking chips and nuts and mix in thoroughly.  Cover bowl with plastic wrap and chill for 10-15 minutes. 

Preheat oven to 350 degrees.  Scoop rounded tablespoons of dough onto cookie sheets, 12 to a sheet.  Sprinkle lightly with sea salt.  Bake at 350 for 7-8 minutes, until outside looks slightly cracked.  Be careful not to overbake because they will continue to bake as they cool.  Allow cookies to cool on sheets for 2 minutes, then remove to wire racks to finish cooling.  Cookies will be soft and gooey in the center. 


Saturday, September 22, 2012

Huevos Rancheros for 2

Some things are just easier to cook for 2 (or one). Fried eggs are definitely one of those things - or at least I think they are. I prefer my fried eggs to be served immediately upon coming out of the pan, they just aren't the same if you have to hold them and keep them warm for a substantial amount of time. So I find Huevos Rancheros to be an ideal recipe for 2 (or one).

I actually picked up this technique from watching Rachel Ray - she made it on 30 Minute Meals once and I immediately had to try it. In my version I've added steamed rice in a decidedly untraditional twist, but the method is otherwise the same.

This is a great dish for any time of day - we tend to have it for a quick dinner when we haven't planned anything and, honestly, you can make it in less than 30 minutes easily, if you are making it for one or two people.

I'm sorry to say I am totally guilty of deciding as I was finishing this dish (and just couldn't resist taking a picture) that I wanted to include it for the blog (it's true, I am a fly-by-the-seat-of-my-pants blogger) so I didn't take pictures along the way, but it's really simple to make and, like a lot of my "recipes", it's really more about the method than a specific recipe.


This is an especially good dish to make when you have leftover beans and/or rice in the fridge and tortillas hanging around. I try to keep a small variety of canned beans in my pantry for occassions like this when I just haven't planned ahead for dinner (you'd be surprised how often that is considering how much I like to cook).

Huevos Rancheros

1 can (15 oz) pinto beans or black beans, drained and rinsed
1 cup cooked rice (optional), warm
1 can (4 oz) diced, fire roasted green chilis
2 green onions, chopped
2 tbls taco sauce or salsa
1 tsp Ground Cumin
2 tsp Chili Powder
1/2 tsp Ground Coriander
1 tsp Cilantro
Salt & Pepper to taste
approx 1/4 cup chicken stock, beer or water
2-4 corn or flour tortillas (1-2 per person depending on size)
2-4 eggs (1-2 per person, to personal preference)
2 oz Shredded Cheddar or Monterey Jack Cheese (optional)
2-4 eggs (2 per person)

Have two plates or pasta bowls ready for plating before you start cooking so you can "build" the dish as each component is complete.

Place beans in a small saucepan on medium low heat. Add taco sauce or salsa (I used green taco sauce but I have used salsa in the past too), green onions (reserving a few for garnish), spices and stock, beer or water - just enough to keep everything moist (you can add more later if you need to). Stir occassionally. Just let the beans hang out getting heated through and soaking up some tasty flavors and keeping an eye on them while you get everything else together .

Heat tortillas over the open flame of your gas stove or in a dry, cast iron skillet - just until blistered and warm through. Place them right on your plates or bowls.

When the beans are heated through, fry the eggs according to your personal preference.

On each plate, top tortillas with about 1/2 cup rice, 1/2 of the beans and fried eggs. Top with shredded cheese and sprinkle with reserved green onions. Serve immediately.


Saturday, August 11, 2012

Scrambled Egg & Rice Casserole - For 2 Please!


I hope everyone has been enjoying their summer - I know I have - I hope you're not all out there melting in overly-hot temperatures. Our sunshine returned Thursday afternoon and we have had lovely, sunny and not too hot weather since then, in fact this weekend has been as close to perfect as any.

I got to talk to my best friend on the phone today and catch up with her (more like download). I made a delicious, summery dinner tonight that my spouse complimented me on several times. And now I'm watching one of my many favorite movies, Top Gun, while my wonderful husband enjoys a football game over at the bachelor pad (my brother-in-law lives in an apartment above our detached garage/shop).

Remember this from my last post?


I promised to share what I did with those scrambled eggs and, at long last, I am finally getting this post put together.

I believe I may have mentioned that our great neices who were living with us moved out when school got out this year so I've been working at "downsizing" our favorite meals and preparing just enough for the two of us. You might think it's an unusual combination - scrambled eggs and rice - but I first discovered I enjoyed it when I starting having leftover rice with scrambled eggs, ham and cheese on top for breakfast and then my husband took it to a whole new level by turning it into a dinner casserole and we've been eating it for years now. This casserole is certainly one of our favorite go-to meals when we haven't made specific plans for dinner. Its so easy to make - perfect for enlisting the help of the kids if you're making it for a whole family and its so versatile you can add anything you have in the fridge.

There's been a lot of talk about meatless Mondays in the last couple months or so and although we haven't made a habit of necessarily having our meatless dinner on Mondays, we have been trying to have a meatless dinner at least once a week and one of our favorite choices so far has been portabello burgers. The reason I bring this up is that when I fix the mushroom burgers, I save the stems and put them in the fridge to use in another dish later in the week. So for this casserole, I sliced up those wonderful stems. Of course, depending on what you put in it, this dish also qualifies as meatless!

Prepare your favorite type of rice (leftover works great too) and set aside, then scramble up some eggs and set them aside.


Saute the portabello stems (or any other mushrooms you like) in a skillet with a bit of extra virgin olive oil (you can add butter too, if you like). Cook until the mushrooms start to carmelize, then add salt & pepper to taste. Remove them from the skillet and set them aside. Chop up some green onions and set them aside as well. (If you prefer to cook them, you can throw them in with the mushrooms when they are almost ready.)


Let's take a moment to talk ingredient quantity when cooking for two. For the eggs - cook the same number per person as you normally would. In other words, my husband and I normally eat 2 eggs each if we were having fried eggs for breakfast so I prepared 2 eggs per person for this dish. For veggies being added to a casserole or stir fry in most cases I have been prepping a one half serving per person. I've just found that if you prepare a full serving of each vegetable per person, you end up with way more food than 2 people can eat (and far more leftovers than we want too)! So for this dish I used 2 portabello stems (about the equivalent of 2 mushrooms) and half of a green onion. When it comes to cheese, however, I do go ahead and prep a full serving each. After all, it's going to top each dish and really, can you ever have enough cheese ? I mean, really? I'm just sayin'...

Ok, so now that we got that out of the way... Scoop the rice into a casserole dish (or individual ones like I used). My husband really likes to have a bit of EVOO drizzled over the rice at this point - so I did that, just to make him happy, see how I am? Then I grated some parmigiano reggiano cheese over that (because that's how I like it). Now top it with the scrambled eggs, mushrooms and green onions (or anything else you'd like to include).


Top it with shredded cheese - I used Monterey Jack here, which I love because it melts into such a creamy, yummy consistency that, I think, goes especially well with eggs and mushrooms.


Put your casserole dish(es) in a 375 oven just until the cheese melts and starts to bubble, then serve hot (add a salad if you like). I was so hungry and ready to eat this by the time it came out of the oven that I forgot to take a picture!

So here's the recipe, such as it is:

Scrambled Egg and Rice Casserole For 2

Preheat oven to 375 degrees.

2 cups steamed rice
4 eggs, scrambled
2 portabello mushroom stems, (or 2 small mushrooms of your choice) sauteed
1/2 green onion, chopped
2 oz. Monterey Jack cheese, shredded (or any cheese you like)
1 oz. Parmigiano Reggiano, shredded
salt & pepper to taste
Extra Virgin Olive Oil to taste
Butter (optional) to taste

Prepare a casserole dish or other oven-safe dish with non-stick spray or butter. Spread rice in bottom of dish. Drizzle with EVOO. Sprinkle on Parmesan cheese. Top with scrambled eggs, season to taste, then add mushrooms and green onions. Top with shredded cheese. Bake at 375 for about 10 minutes, until cheese it melted and bubbly.

Wednesday, July 25, 2012

Eggsperiment in the Kitchen


Meet our ladies...and gentleman! We've have had a flock of chickens of one size or another for about 14 years or so. I always wanted to live on a farm but I grew up in a small-ish town in a typcial, middle-class neighborhood. We had a backyard garden and a neighbor accross the street who raised rabbits, but that was as close as I got. So when I met my husband and moved onto his 20 acres in the foothill, it was a dream come true as well as an education. Over the years we've raised cows and pigs for meat, we've had rabbits and a horse to add to our list of pets, and, of course, chickens.

Our current flock is pretty small, but even so we get often get as many as 5 or 6 eggs each day. It's really wonderful to wake up and hear the rooster crowing... To visit the "ladies" for their daily care and have them run up to the fence to greet me. They have a surprising amount of personality and it's really fun to see which kitchen scraps they enjoy. They really love popcorn, bread and pasta.

So this post is actually about eggs - specifically a comparison of store-bought eggs versus eggs from our little flock of ladies. I can remember a time when folks made a big deal about brown eggs versus white ones. The truth is, the color has absolutely nothing to do with it. It just happens that lots of folks who raise chickens happen to raise the breeds that lay brown eggs - so back then, if you saw a brown egg, there was a really good chance that it came from a small farm. The real difference in eggs raised on a small farm is what they are fed. I've noticed our eggs are at their best when the chickens get plenty of veggie scraps added to their diet. When they don't, they really start to resemble the eggs that come from the local grocery chain.


For the purposes of today's post, I traded a neighbor a dozen of our eggs for 4 of their store-bought eggs. There's actually a lot of information about this on the web - lots of it includes nutritional studies, so I won't go into that. But for those of you who ever asked "Is there really a difference" here's a chance to see the differences for yourself and I hope you'll feel encouraged to get ahold of some eggs from your local farmer's market, chicken-raising neighbor, or to simply pull into that farmhouse that you've been driving past for ages with the "eggs for sale" sign on their fence.


Which ones in the photo below do you think are the farm-fresh eggs?

How did you do?

So, for starters, you can see the not only are the yolks of the farm-fresh eggs much darker and brighter in color, but the whites are much clearer too. What you can't tell from the photo is that the whites and yolks also hold together much better - they don't spread out as much - in fact, the yolks are quite thick, as you'll see shortly.

Let's see what happens when I poke the store-bought eggs with a whisk...

Now our farm-fresh eggs:

It may be hard to tell from the photos, but the yolks in the eggs from our own chickens are quite thick and when you poke them, they tend to hold together where the store-bought eggs spread out very readily and have fairly runny yolks. It's like the difference between heavy cream and 2% milk.

Here they are beaten up, can you tell which is which?


Look how thick the farm-fresh eggs are as I pour them into the pan to cook them - they cling to the whisk and dish:


I think scrambled eggs are the best for comparison sake...


And finally, the finished scrambled eggs...

...just in case it isn't clear which is which:

It's hard to describe the difference in flavor, but the certainly is one - you'll just have to test that out for yourself! When you're baking with farm raised eggs, just keep in mind that you may need to adjust flour quantities a bit if the eggs are extra-large.

I hope you've enjoyed this little eggsperiment! I'll be publishing a separate post to share what I did with the farm-fresh scrambled eggs as soon as I can get it put together!


Wednesday, July 11, 2012

Snowcaps


Hi everyone - I'm finally back, I'm sorry for the long absence - I've had a lot going on in my household lately - the kids moved back in with their mom (so the house is suddenly very empty), my parents and in-laws have been having lots of health issues and I recently left a job situation that was becoming very toxic. Time for new beginnings!

You would think with all this time on my hands that I'd be posting left and right, but honestly, realistically, I do need to find another "day" job so that has been consuming a fair amount of time and there was the holiday. My parents and sister joined us for the 4th - it was the first 4th I wasn't working in 4 years! I hope you all had a lovely, safe holiday. I neglected to take much in the way of photos - which is a shame because we had some lovely copper river salmon, grilled asparagus, roasted potatoes and watermelon margaritas...Can I just say - YUM!


This is some trail mix my husband made. It's loaded with apples and plums from our own trees that he dehydrated last fall.

We have a close, personal friend who has been supporting my cookie-baking habit by purchasing a dozen cookies from me every couple of weeks. I send him a container of cookies and when he's ready for more, he sends the container back. I'd been itching to make Snowcaps - a tasty, oreo-like variation of the Chocolate cookie recipe I used for Chocolate Salted Caramel Thumbprints which you can find here, so when his empty container was delivered to me last night, I knew just what to make him.

These are wonderfully dark chocolate cookies. In this case, I simply frost them with cream cheese frosting. Just look how dark the dough is...

...and the cookies fresh from the oven, before I hit 'em with the cream cheese frosting...

Oh no! I ran out of frosting!!! Hmmmm...Did I tell you these also make wonderful ice cream sandwiches? Well, they do! They are good...really good... Oh Darn! I guess I'll just have to get to the store and pick up some ice cream...


The cream cheese frosting recipe I use is my Grandma Marion's - both of my Grandma's were talented cooks and Grandma Marion's Carrot Cake is the best I've ever had. I'll post it here some time in the future, but I use her frosting recipe more than I make the cake since I like it on these cookies as well as on sugar cookies. The recipe makes a lot, enough for 2 cakes, and it freezes well, in fact, the frosting I used for the cookies came from the freezer from the last time I made her Carrot Cake. It comes together pretty quickly and you can go ahead and frost your cookies with it as soon as it's well blended, but if you beat it in your mixer a bit longer - you'll get a frosting that has a whipped-cream consistency - that is how I like it best.

Grandma Marion's Cream Cheese Frosting

1/2 Cup Butter
8 oz Cream Cheese, at room temperature
1 tsp vanilla (do not reduce vanilla, even if you halve the recipe)
1 lb powdered sugar
Milk, as needed

Cream butter, cream cheese and vanilla. Beat in one pound of powdered sugar (the recipe says to sift, but I never bother). Add milk if necessary to get the spreading consistency you prefer.

One thing about this frosting, it takes awhile to set up so be sure to allow plenty of time for the frosted cookies to dry before attempting to stack them on platters or adding them to cookie jars.