Wednesday, December 28, 2016

Holiday Entertaining: Appetizers

Whatever you celebrate and wherever you are, I hope the holiday season has been filled thus far with peace, love, joy & great food!

Today, I posted a video about how to make 3 appetizers that we really enjoy here in our house (see the link a bit farther into the post): Taco Bites (which I have long promised to share a recipe for), Pesto-Parmesan Crostini & Sausage Rolls. The latter 2 apps really require no recipe at all (visit the video link for instructions), but I wanted to share the actual recipe for the Taco Bites with you here (as well as for any viewers who might like some guidelines to follow).  All of three of these appetizers are delicious and perfect for your New Year's Eve parties (or any other entertaining opportunities that you may have coming up).

A former coworker of mine found the Taco Bites recipe in a magazine – it was the winner of one of those recipe contests where you create a recipe with a specific ingredient – Ranch Dressing in this case – and she thought it sounded good so she fixed it for our company Christmas party.  We all loved them, so she shared the recipe and I’ve been making them ever since.  They are always a hit!  

I don’t actually measure anything with these, I just go head and brown my sausage of choice, then add chopped bell pepper and olives until it looks balanced, throw in the cheese and add just enough dressing to hold it all together.  Here's the video, in case you'd like a visual:


You can bake the shells a couple of days in advance and also make the filling a couple of days in advance, but don’t fill them until the day you’re going to serve them, or they’ll get soggy.  Also, if you’re going to take them to a party or someplace where you’re unsure of the oven availability, you can bake the shells a full 10 minutes, then fill them, keep them cold and transport them wherever you’re headed.  Microwave them when you’re ready to serve, just until the cheese melts and everything is bubbly.


I hope you will enjoy all of these.  What are your favorite appetizers for the holiday season?

 Here's the recipe for the Taco Bites:

Taco Bites

1 pkg - Won Ton Skins (or egg roll wrappers cut into ¼’s)
1 lb sausage, any kind you like (I like Italian)
1 bell pepper, any color, chopped
7 or 8 oz olives, sliced
2 cups shredded cheddar and jack cheese
1 cup ranch dressing (I never use the whole cup, I just use enough to hold everything together)

Preheat oven to 375.  Spray mini muffin pan with olive oil spray or brush with olive oil.  Line mini-muffin cups with won ton wrappers (you can also use egg roll wrappers cut into quarters), then spray or brush with olive oil.  Bake 5 minutes.  Remove from oven and set aside.

Brown sausage in a skillet, drain on paper towels.  In a bowl combine brown sausage, olives, peppers and cheese.  Add ranch dressing until it all holds together.


Fill baked won ton wrappers with filling and place on a cookie sheet or in a baking pan.  Bake another 5 minutes, or until cheese is melted and everything is bubbly.  Serve hot. 

Ciao!

Wednesday, December 21, 2016

Egg-in-a-Hole Grilled Cheese with Bacon


I first experience egg-in-a-hole when by best friend made it for me for breakfast one day while I was visiting her in Vegas.  I don't know how it is that I had never had it before, but I fell in love with it on the spot.  For some reason though, I never really made it myself until recently.  Then, when I was snowed in this weekend, I came up with this Egg-in-a-Hole Grilled Cheese with Bacon and my-oh-my was it good!

I had just made the egg bread I posted last week and I knew it would be perfect for this sammy so I went for it.  It was lovely.  The bread grilled up with a delightfully delicate crunch while still maintaining it's spongy crumb.  The cheese adds it's ooey-gooey-melty goodness and the pepper bacon added a nice chew to the texture while also adding a lovely smokiness and a slightly peppery bite.


I made these for my husband and I for lunch, so I started out with 4 slices of bread, cutting a hole in 2 of the slices...


I placed one regular slice and one slice with the hole cut out of it in my preheated, buttered, cast iron skillet...


Then I cracked an egg right into the hole and seasoned it with salt and pepper.


Once both slices are nicely browned, turn them over and place a couple slices of cheese on the non-holey (non holey????) slice.


...and cover with the cheesy slice.  Let it grill just a little bit longer to ensure the cheese gets fully melted.  At this point, you can grill the holes you cut out of the bread.  


Remove from the pan and serve hot!  Repeat with the second sandwich (or you could use a two-burner griddle and make both sammies simultaneously).

Voila!  A lovely Egg-in-a-Hole Grilled Cheese with Bacon Sandwich.  YUM!


Enjoy - Ciao!


Wednesday, December 14, 2016

Egg Bread


Well, it has been cold and snowy here in the foothills of the cascade mountains.  Here at our house, we had a foot of snow dumped on us Friday!  In an effort to help keep us warm (and knowing we wouldn't be going to the store any time soon), I made Egg Bread for us to enjoy this weekend.  I took a little help from my bread machine and I followed a recipe from Best Bread Machine Recipes.


I've never really liked the loaf size of the bread pan on my machine, nor do I care for the large hole that always results in the baked loaf, so I like to use the machine to handle the mixing and raising, then transfer the loaf to my own pan (or free-form it), so that's what I did with this loaf.


My husband couldn't wait to dig in, so he kindly took these last two photos for me (isn't he great?)! This recipe resulted in the perfect bread for sandwiches - cold or grilled, toast and I'm pretty sure it would make absolutely delicious French Toast.  The crumb is spongy, tight and resilient, the crust is crisp and delicate and the egg lends it a lovely, dare-I-say creaminess, that just about melts in your mouth.  If you're looking for the perfect every day loaf for lunches, breakfast, and enjoying with a nice slathering of butter - this is it!

Egg Bread*

3/4 cup milk
1/4 cup water
1 egg
2 tbls butter, melted
3 cups bread flour
2 tbls sugar
3/4 tsp salt
1 tsp active dry yeast

If you are using a bread machine, follow the manufacturer's instructions for making bread.  If you are making this bread by hand:

Heat milk and butter until butter is melted and milk scalds.  Add water.  Check the temperature - ideally it should be 80-90 degrees for dissolving the yeast.  I usually shoot for baby-bottle temperature - you should be able to touch it without getting burned and it should just about match your body temperature if you test it on your wrist.  Sprinkle on the yeast and let it sit for 5-10 minutes.  Stir to combine.  Beat the egg lightly, then add it to the milk, butter & yeast mixture.  Stir in the sugar and salt as well.  At this point, you can continue by hand or switch to an electric mixer with a dough hook attachment.  Gradually add the flour, one cup at a time, until it is fully incorporated and forms a soft ball of dough.  Cover with plastic wrap or a damp towel and set it in a warm place to rise until it doubles in size (about an hour).

Lightly knead the risen dough and form it into a log, about the size of your loaf pan.  Spray the pan with non-stick spray (or coat it with butter) and place the formed loaf in the pan.  Split the top with a sharp knife and allow it to rise for about another 30-45 minutes.

Bake at 350 degrees for 35-45 minutes (it took exactly 35 minutes in my convection oven).  The finished loaf should be golden brown on top, bottom and sides and should sound hollow when you tap it.  Remove it from the pan and allow it to cool for as long as you can stand it until you have to break down and have some!

*this recipe is for a 1 1/2 pound loaf, the book also has a recipe for a 2 pound loaf

Enjoy - Ciao!


Wednesday, October 26, 2016

Cookie of the Month: Chocolate Monster Cookies


How cute are these Chocolate Monster Cookies?  It's cookie of the month time again and I just couldn't resist making these when I found them on Pinterest!

I started with the concept from these halloween double chocolate monster cookies that I found on Pinterest.  I wasn't wild about the recipe - I really wanted something closer to my tried and true Chocolate Chip recipe, but I didn't have time for experimentation, so I searched recipes for something I felt confident would work, so I used this Chocolate Chocolate Chip recipe I found on All Recipes and tweaked it to match the image.

As per my usual m.o., I switched up the order and method used too.  Melting the butter (as is almost always my custom these days), stirring in the cocoa powder after incorporating the sugar and adding the baking soda, salt and vanilla before adding the flower.  I used dark chocolate cocoa powder and skipped the chocolate chips altogether, using just Reese's Pieces and candy eyes instead.

The end result was a lovely, dark chocolate cookie with the chocolate chip cookie texture I love.  Chewey on the inside, slightly crisp on the outside.  My husband and I really wished I had included nuts too, but I wanted to be sure to make cookies that would appeal to a wide range of tastes - but nuts would add a nice crunch, balance the sweetness and, I'm sure, do nothing but add to the monster appearance of the finished product.  Why not whip up a batch with your little monsters this Halloween season?


Chocolate Monster Cookies

1 cup butter, melted
1 1/2 cups granulated sugar
2/3 cup dark chocolate cocoa powder (I used Hershey's Special Dark)
2 eggs
3/4 tsp baking soda
1/4 tsp salt
2 tsp vanilla
2 cups flour
2 cups Reese's Pieces
1 pkg candy eyes
1/2 cup chopped walnuts (optional)

Stir sugar into melted butter and mix until completely emulsified.  Add cocoa powder, stirring in to mix well.  Allow mixture to cool.  Add eggs and mix well.  Stir in baking soda, salt and vanilla.  Add powder to mixture and top with Reese's Pieces, stir in until just incorporated.  Chill dough for 45 minutes to 1 hour.

Preheat oven to 350 degrees.  While oven is preheating, scoop cookies onto silicone or parchment lined baking sheets (or sheets sprayed with non-stick coating).  Add 2 candy eyes to each ball of dough, pressing down lightly.

Bake 8-10 minutes, or until set.  Allow to cool on cookie sheets for 2 minutes, remove to wire rack to finish cooling.  Makes 3 dozen plus.

Ciao!


Wednesday, October 19, 2016

Quick Fix: White Chicken Chili


I can't believe I didn't post this recipe years ago, it's one of our absolute favorite, go-to soups.  I've made it twice this week alone.  It's ideal for a quick dinner one a week night and it's equally great for casual entertaining.

This White Chicken Chili has a slight kick to it and is full of the flavors I love - I include plenty of smokey cumin, coriander, chili powder and lime - just to name a few.

The thing about soups that make them perfect for week night meals is that you can make almost any type of soup in about 30 minutes (French Onion soup and Baked Potato soup are the two exceptions that spring to mind at the moment).  You just throw your base ingredients into the pot and you slice, dice or chop them up, saute them and add stock.  You can easily scale a recipe up or down - have a couple extra guest for dinner? Just add a couple more cups of stock.  Dinner for 2 tonight, use only 4 cups stock.  Voila - what could be easier?  Or more satisfying?


I made a video of this recipe too, here it is:


...and here's the recipe.

White Chicken Chili

1 lb chicken, cut into bite-sized pieces
1/2 onion, chopped (or 1 tbls minced onion)
1/2 bell pepper, chopped
1 jalapeno, seeded and diced
1 can green chiles, drained
1 can white beans, drained and rinsed
6-8 Cups chicken stock
Juice of 1 lime (add the zest too, if you like)
1 tbls Extra Virgin Olive Oil
1 tsp cumin, ground
1 tsp chili powder
1/2 tsp onion powder
1/4 tsp garlic powder (or one small clove garlic, minced)
1/4 tsp coriander, ground
1/4 tsp oregano
1/4 tsp smoked paprika
Salt & Pepper to taste

Preheat olive oil in a large soup pot or 3 qt dutch oven.  Add chicken and top chicken with the spices. Stir to coat chicken, then let chicken cook until lightly browned on one side.  Add onions (if you decide to use fresh garlic, add it now too), stir and cook until chicken is lightly browned on 2nd side and onions are translucent.  Add peppers and green chiles, stir in and cook for a couple more minutes. Stir in beans and stock.  Bring the soup to a boil, then reduce heat and simmer for 5-10 minutes.

Top soup with tortilla chips, cheese, sour cream and green onions and enjoy.

Ciao!


Wednesday, September 28, 2016

Cookie of the Month: Peanut Butter Chocolate Chip


I just shipped another dozen plus cookies out for the Cookie of the Month winner.  Since it's officially Fall now and since school just started, Peanut Butter Cookies of some variety seemed appropriate. When it comes to cookies, my husband always wants chocolate involved and these Peanut Butter Chocolate Chip Cookies really fit the bill.  I used milk chocolate chips to give them that classic peanut butter cup flavor and I added my own twist by throwing broken up pretzels in too - it all ends up being a lovely balance of gooey, melted chocolate, chewy peanut butter cookie with a hint of salty crunch.  Da bomb with milk!


Wouldn't your family be thrilled to come home to a plate of these after a long day of work, or school?


Give them a try and let me know how they turn out!

Peanut Butter Chocolate Chip Cookies

1/2 Cup butter, melted
1/2 Cup creamy peanut butter (you can use chunky too, but you might want to increase the milk a tad as I find they turn out drier)
1/2 Cup packed brown suger
1/4 Cup granulated sugar
1 egg
1 TBLS milk
1 tsp vanilla
1/2 tsp baking powder
1/2 tsp salt
1 Cup unsifted flour
1 Cup chocolate chips (I prefer milk chocolate for these, but semi sweet or dark are lovely too)
3/4 Cup broken pretzels (or dry roasted, unsalted peanuts)

Melt butter in microwave in a large mixing bowl.  Cream butter, peanut butter and sugar together until melted butter no longer separates from the batter. Allow to cool until you can comfortably rest your hands on the bottom of the mixing bowl.  Add egg, milk & vanilla and mix well.  Stir in baking powder and salt.  Add flour and top with chocolate chips and pretzels - stir them all in together until combined.

Chill dough for 15 minutes.  Preheat oven to 350 degrees.  Scoop dough onto cookies sheets that have been lightly sprayed with non-stick coating or lined with silicone mats or parchment. Bake 10-14 minutes until edges are golden brown.  Allow to cool on baking sheets for 1 minute, then transfer to wire racks to finish cooking.

Makes 2 1/2 dozen (plus).

Ciao!


Wednesday, August 31, 2016

Cookie of the Month: Lemon Crisps


Have I told you that I work for a non-profit?  Well, I do and, like a lot of non-profits, one of the things we do a lot of is fundraising. Just since April, we have already put on one luncheon, two bike rides and two walks - and we have 8 walks to go before our event season will be over.  For this year's bike ride in my neck of the woods, my coworkers approached me about offering cookies as an auction item.  We had someone donate a sweet of the month package - pies, brownies, cookies, cakes - all kinds of sweets and since they know how much I like to bake cookies, they suggested I offer the same thing with cookies.  So I did it - and the package was auctioned off for $100!  Pretty cool.

I knew right away which cookie I would make for August.  I love, love, love these Lemon Crisp cookies for summer entertaining.  There is something so summery about lemons for me and these cookies don't disappoint - slightly crisp on the outside, soft and chewy on the inside (so much so that I was surprised they are called "crisps"), with just the right balance between sweet and tart.  I can't remember if I found this recipe online and Pinned it, or if I found it directly on Pinterest, but either way, I Pinned it and have been making them pretty regularly ever since.

I'm not going to share the recipe here, since it's well covered on it's original bloggers' page (and there was no need to change it in any way) but I will share pictures of the process...

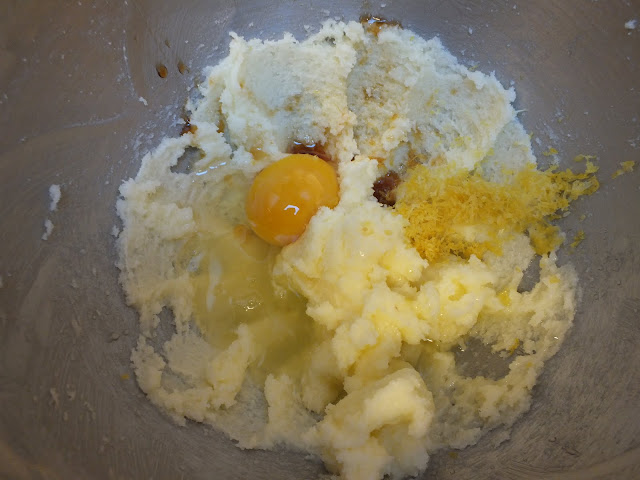
Cream the butter and sugar together...


... add the wet ingredients and lemon zest...


... add the dry ingredients...


... mix until it just comes together...


... and it's ready to scoop.


Once they are baked, they will look like this:


While they're cooling you can whip together the icing - I used only 1/2 cup of powdered sugar and drizzled in some lemon juice...


...this is the consistency I went for - just thin enough to drizzle, but not so thin it would run everywhere...


... then I drizzled it onto the finished cookies.  Mine aren't as pretty as the original bloggers' are, but they sure are tasty and I'm sure my Cookie of the Month auction package winner will really enjoy them!


I'll be posting the cookies I send out each month - some of them may be throwbacks to older posts (so keep an eye out for the odd Thursday post instead of the usual Wednesday post) and some will be recipes I've yet to share with you.  I hope you will make them all and share your results!

Ciao!


Wednesday, August 24, 2016

Cheers: Cherry Limeade


Today, I'm introducing a new series for this blog and the CJ's-Kitchen YouTube channel I'm calling "Cheers".  Ever since I first signed up on Pinterest, I've had a "Cheers" board and it's filled with recipes and images of beverages so I thought it was about time I started sharing some of my personal favorite beverages with you!

Cherry Limeade is a recent addition to my list of refreshing summer favorites and I decided I wanted to make it myself, from scratch.  It has the lovely tartness you'd expect from a limeade with a nice hit of cherry sweetness to balance it all out.

I started by finding a recipe for a Cherry Simple Syrup, just to have a starting point for the measurements and tweaked it to my liking from there.  Next, I found a limeade recipe that sounded about right for my taste, reduced the recipe down to a single serving quantity and subbed in the Cherry Simple Syrup for regular Simple Syrup.  The full recipe would make enough for 4 servings.

To make the Cherry Simple Syrup you can use either fresh or frozen cherries.  The first batch I made was from fresh cherries, but they are now officially out of season, so when I made it today for the post, I used frozen.

Simply stir together some water, sugar and cherries over medium high heat until the sugar dissolves and it all comes to a boil.


Mash the cherries with a potato masher or ricer - just so they are broken up enough to release their lovely juices and flavor.


Let it boil for about a minute, then turn off the heat, let it cool and strain it into a jar or pitcher for easy pouring when you use it.

Then juice some limes - enough for 1/4 cup of lime juice.  I mixed my limeade in a single-serving quantity using a gravy shaker.  Just mix the lime juice, cherry simple syrup and some water together and shake it up.  Pour it over ice, garnish with a slice of lime and you're all set to kick back and relax with this lovely, refreshing drink.  Cheers!


Cherry Simple Syrup

1 Cup pitted cherries, fresh or frozen
1/2 Cup sugar
1 Cup water

Place cherries, sugar and water in a medium saucepan and bring to a boil over medium-high heat, stirring to dissolve the sugar.  Mash cherries with a potato masher, just enough to break them up. Lower the heat to medium and continue to boil mixture for 1 minute.  Turn off heat and allow mixture to cool.  Strain mixture into a jar or pitcher.

Cherry Limeade
Full Recipe,  4 servings

1 Cup Lime Juice, fresh or bottled
1 1/2 C Cherry Simple Syrup
4 Cups Water

Single Serving Recipe

1/4 Cup lime juice
1/4 Cup, plus 2 TBLS Cherry Simple Syrup
1 Cup Water

Mix all ingredients together in a pitcher, glass or cocktail shaker.  Pour over ice.  Serve cold (with a lime slice garnish, if you like).

Ciao!


Wednesday, August 17, 2016

Blog Update - Vacation Time


I hope you've been checking out my companion YouTube Channel CJ's-Kitchen and enjoying the videos there.  I have lots of ideas and projects in the works, but before I kick those off, I'm taking off with my husband and my Dad to the beach to enjoy the annual Kite Festival and some much needed downtime.

There's a possibility that I might decide to vlog from the beach - maybe just beach musings, maybe actual food or cooking related content so I wanted to be sure to ask you to keep an eye on my channels.  Yes channels.  I may have neglected to tell you that, in addition to CJ's-Kitchen, I also have a secondary channel, CJ Vlogs.  I haven't done any actual vlogging yet, but I knew when I created the CJ's-Kitchen channel that I'd have some off-topic videos sooner or later and, in fact, I purposely shot some video and posted it there first, just so I'd know what I was doing once I had my first food video ready to roll.  So you'll find a random collection of videos of  my cat being cute and playful, and also some video my brother in law shot using a Go Pro camera and a quad-copter - pretty neat aerial footage of our house, yard and environs.  If I do some vlogging from the beach and it's not food related, that's where you'll find it.  If it's food related, it'll be on CJ's-Kitchen, right where you expect it.

I hope you'll check in.  In the meantime, have fun, stay cool and I'll see you in my kitchen when I get back - Ciao!

Thursday, August 11, 2016

Throwback Thursday: Perfect Summer Meals


How has your summer been so far?  Has it been treating you well?  Ours has not been as warm as I would like, but it's still been pleasant.  I always love being able to leave the doors and windows open at night, listen to the crickets and go barefoot.

Along with summer comes a preference for lighter, cooler and less intensive meals.  We tend to eat a lot more salads, sandwiches and simple dinners of fruits, cheeses and charcuterie - like this simple meal I posted recently. Ice cream becomes the King of desserts and we really enjoy small, home-assembled Ice Cream Sandwiches.

I wish I could say that we spend our time outdoors, swimming (which we do love), gardening, hiking and camping, but to be perfectly honest, I spend most of my spare time working indoors on recipes, blog posts and videos or gaming with my friends.  Aside from the occasional trip (by occasional, I mean yearly or maybe every other year) to the ocean to hang out on the beach flying kites, we tend to be real homebodies.


With summer already starting to wind down here (it's only 9:00 pm right now, and it's already been dark for about an hour!), I thought this would be a good time to share with you some of our favorite meals for hot weather - some might even say perfect summer meals.
 
Nacho salads are a quick, refreshing meal for warmer temperatures.  Simply layer your favorite filling onto a bed of tortilla chips...


...and pile on a bunch of crunchy, iceberg lettuce, olives, green onions, tomatoes, cheese and sour cream.


Sandwiches are a great choice for hot weather and if you are among the many who rely on their grills in summer, you can grill up a variety of great sandwich fixins from steak, to chicken, to seafood or veggies - the choices are truly endless.  This one is a Bolillo roll filled with steak, sauteed mushrooms, onions and bell peppers and sprinkled with Feta:


...and this sandwich built on a Pretzel Bun with lemon-garlic mayo, turkey, provolone and spinach - YUM!

This Asian Noodle Salad is perfect for a potluck or pool party - or add some grilled chicken to it and enjoy it as a refreshing meal.


I've made this Orzo Salad with either chicken or shrimp, it's always a winner for BBQ's...


...and you certainly can't go wrong with a simple, green salad topped with grilled shrimp or Spaghetti with Lemon-Garlic Shrimp which cooks up in minutes.


What are your strategies for beating the heat?  We're off to the ocean next week, so no posts for a bit, but I'll be sure to return rested, relaxed and ready to bring you more recipes and cooking tips.  Until next time - stay cool!