Showing posts with label cookies. Show all posts

Wednesday, October 26, 2016

Cookie of the Month: Chocolate Monster Cookies


How cute are these Chocolate Monster Cookies?  It's cookie of the month time again and I just couldn't resist making these when I found them on Pinterest!

I started with the concept from these halloween double chocolate monster cookies that I found on Pinterest.  I wasn't wild about the recipe - I really wanted something closer to my tried and true Chocolate Chip recipe, but I didn't have time for experimentation, so I searched recipes for something I felt confident would work, so I used this Chocolate Chocolate Chip recipe I found on All Recipes and tweaked it to match the image.

As per my usual m.o., I switched up the order and method used too.  Melting the butter (as is almost always my custom these days), stirring in the cocoa powder after incorporating the sugar and adding the baking soda, salt and vanilla before adding the flower.  I used dark chocolate cocoa powder and skipped the chocolate chips altogether, using just Reese's Pieces and candy eyes instead.

The end result was a lovely, dark chocolate cookie with the chocolate chip cookie texture I love.  Chewey on the inside, slightly crisp on the outside.  My husband and I really wished I had included nuts too, but I wanted to be sure to make cookies that would appeal to a wide range of tastes - but nuts would add a nice crunch, balance the sweetness and, I'm sure, do nothing but add to the monster appearance of the finished product.  Why not whip up a batch with your little monsters this Halloween season?


Chocolate Monster Cookies

1 cup butter, melted
1 1/2 cups granulated sugar
2/3 cup dark chocolate cocoa powder (I used Hershey's Special Dark)
2 eggs
3/4 tsp baking soda
1/4 tsp salt
2 tsp vanilla
2 cups flour
2 cups Reese's Pieces
1 pkg candy eyes
1/2 cup chopped walnuts (optional)

Stir sugar into melted butter and mix until completely emulsified.  Add cocoa powder, stirring in to mix well.  Allow mixture to cool.  Add eggs and mix well.  Stir in baking soda, salt and vanilla.  Add powder to mixture and top with Reese's Pieces, stir in until just incorporated.  Chill dough for 45 minutes to 1 hour.

Preheat oven to 350 degrees.  While oven is preheating, scoop cookies onto silicone or parchment lined baking sheets (or sheets sprayed with non-stick coating).  Add 2 candy eyes to each ball of dough, pressing down lightly.

Bake 8-10 minutes, or until set.  Allow to cool on cookie sheets for 2 minutes, remove to wire rack to finish cooling.  Makes 3 dozen plus.

Ciao!


Wednesday, August 31, 2016

Cookie of the Month: Lemon Crisps


Have I told you that I work for a non-profit?  Well, I do and, like a lot of non-profits, one of the things we do a lot of is fundraising. Just since April, we have already put on one luncheon, two bike rides and two walks - and we have 8 walks to go before our event season will be over.  For this year's bike ride in my neck of the woods, my coworkers approached me about offering cookies as an auction item.  We had someone donate a sweet of the month package - pies, brownies, cookies, cakes - all kinds of sweets and since they know how much I like to bake cookies, they suggested I offer the same thing with cookies.  So I did it - and the package was auctioned off for $100!  Pretty cool.

I knew right away which cookie I would make for August.  I love, love, love these Lemon Crisp cookies for summer entertaining.  There is something so summery about lemons for me and these cookies don't disappoint - slightly crisp on the outside, soft and chewy on the inside (so much so that I was surprised they are called "crisps"), with just the right balance between sweet and tart.  I can't remember if I found this recipe online and Pinned it, or if I found it directly on Pinterest, but either way, I Pinned it and have been making them pretty regularly ever since.

I'm not going to share the recipe here, since it's well covered on it's original bloggers' page (and there was no need to change it in any way) but I will share pictures of the process...

Cream the butter and sugar together...


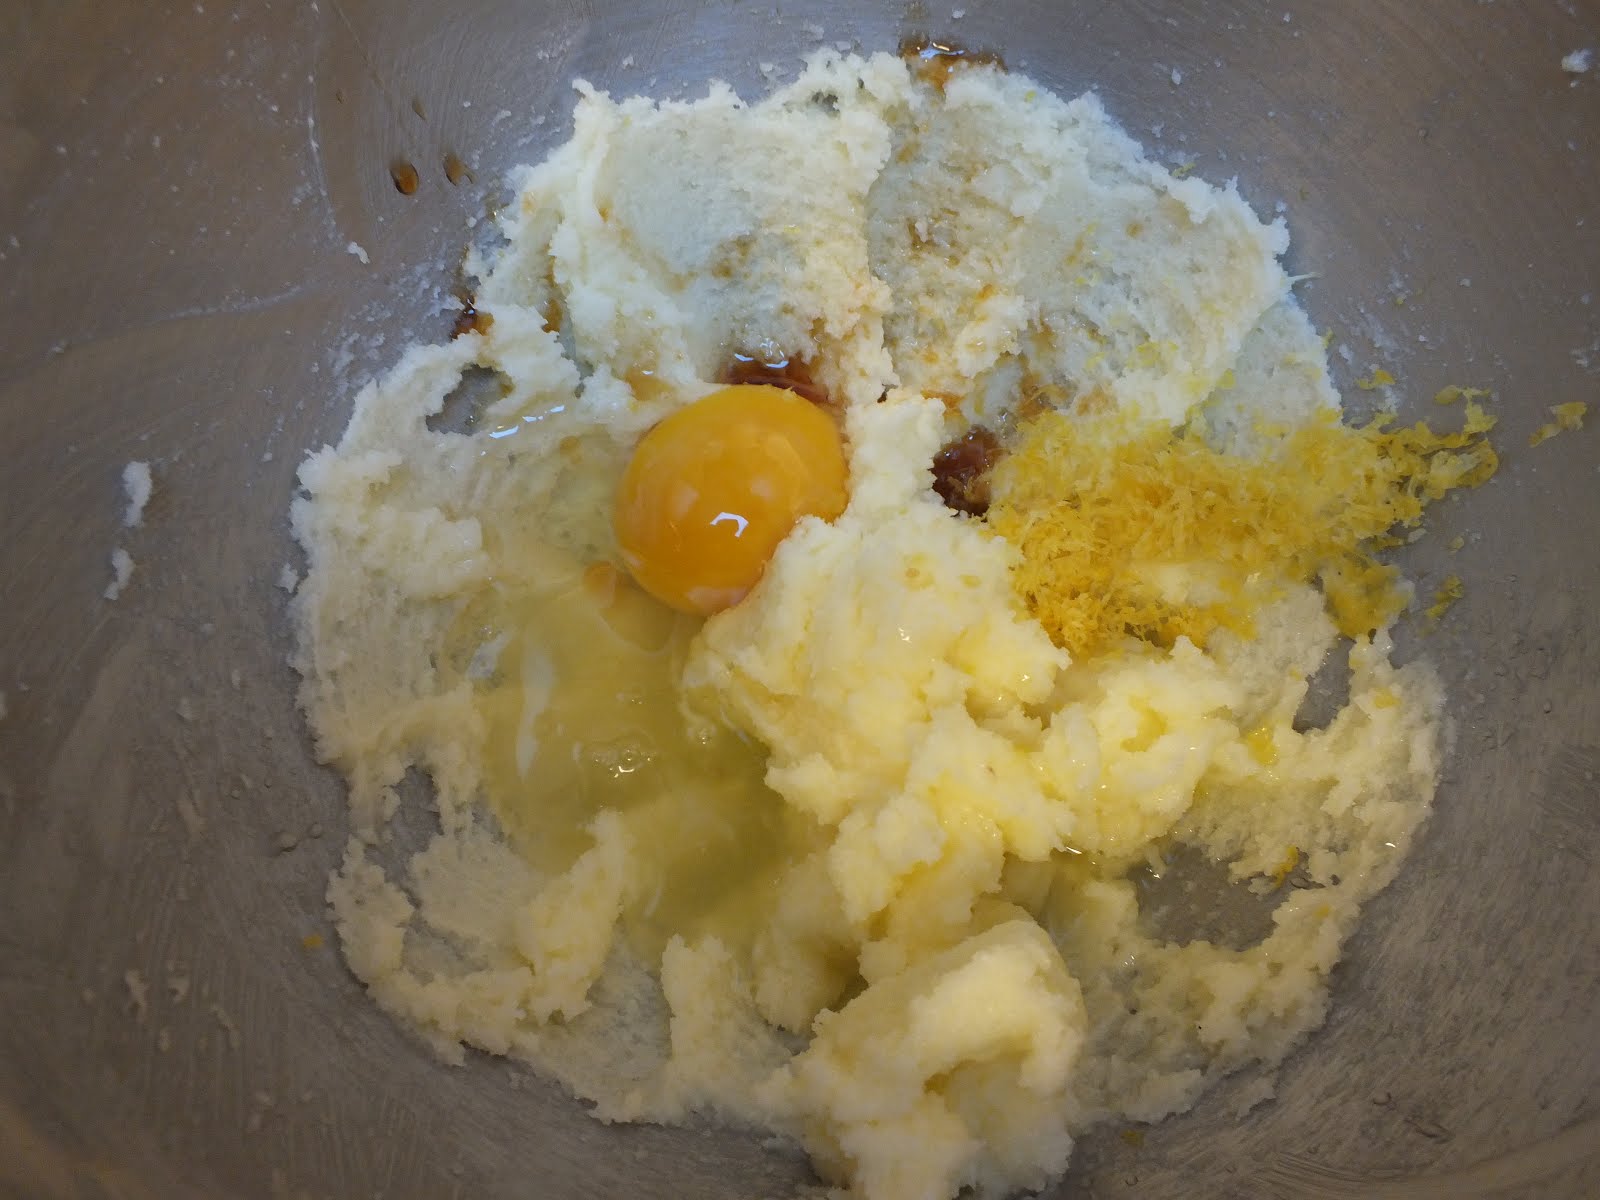
... add the wet ingredients and lemon zest...


... add the dry ingredients...


... mix until it just comes together...


... and it's ready to scoop.


Once they are baked, they will look like this:


While they're cooling you can whip together the icing - I used only 1/2 cup of powdered sugar and drizzled in some lemon juice...


...this is the consistency I went for - just thin enough to drizzle, but not so thin it would run everywhere...


... then I drizzled it onto the finished cookies.  Mine aren't as pretty as the original bloggers' are, but they sure are tasty and I'm sure my Cookie of the Month auction package winner will really enjoy them!


I'll be posting the cookies I send out each month - some of them may be throwbacks to older posts (so keep an eye out for the odd Thursday post instead of the usual Wednesday post) and some will be recipes I've yet to share with you.  I hope you will make them all and share your results!

Ciao!


Thursday, July 14, 2016

Casual Enteraining: Ice Cream Sandwiches


I hope you all had a fabulous 4th of July holiday!  My family spent the whole weekend at our house so we had a house full and I feel like we did nothing but cook, eat, clean up and start all over again.  It's not entirely true, but not too far off the mark either.

These Ice Cream Sandwiches really hit the spot.  You can't beat ice cream for cooling you off in the summer!  They were small enough to be perfect for those who wanted a small bite of sweet after a full meal, but also small enough that you didn't feel guilty if you ate more than one (not that any of us would do such a thing!).

The key to these lovely treats is finding the perfect cookie.  One that is thin and crunchy, but not too delicate.  You can bake your own or save time, like we did, and use store-bought.  There are a couple of brands I really like for these - Marie is at the top of my list, followed closely by Nabisco Famous Wafers (which, sadly, I haven't been able to find lately), there are some other really great "biscuit" style cookies that work for these too, but I'm sorry to say the brand names aren't coming to mind right now.  For our 4th of July treats, we used Marie and Nyakers (these were Ginger Snaps) - both of which I happened to purchase at Cost Plus World Market on one of my Hauls.


This is the first time I've dressed them up around the edges with ice cream toppings.  I used salted, roasted peanuts that I chopped and miniature chocolate chips.  I especially enjoyed the addition of the nuts, they provided a nice balance with the sweet, creamy ice cream, the crunchy, slightly sweet cookies and that lovely, salty touch of nuts!

I shot some video when I made them - hope you enjoy it!


Do you have any treats you like to cool off with during the summer?  I'd love to hear about them!

Until next time - Ciao!

Wednesday, April 6, 2016

Sweet Tooth: Mayhem Chocolate Chip Cookies

Mayhem Chocolate Chip Cookies

Cookies are hands-down, my number one, go-to favorite treat to bake.  I came up with this chocolate chip cookie variation several years ago and they are definitely the tastiest cookie I make - they are also Steven's favorite (in fact, he came up with the name) so I try to indulge him occasionally with a batch.

These cookies are chewy and tender on the inside with a lightly crisp outer texture and they are packed with flavor and buttery goodness.

Start with 2 sticks of melted butter...


... add brown sugar and granulated sugar...


... whisk them together until they are not only incorporated by completely emulsified.  The mixture should look this this:


Let the mixture cool a bit, you should be able to comfortably place your hands on the bottom of the bowl, then crack in the eggs and measure in the baking soda, salt and Rum Emulsion (or rum extract, or any extract you prefer)...


For years, I used rum extract but one day, I was shopping for cookie cutters and discovered this emulsion and I have found it to work much, much better - you can actually taste the flavor in the cookie.  You can find the rum emulsion here (plus lots of great cookie cutters amongst other handy baking items).


Stir everything in...


... now measure in your flour...


... and in these lovely, dark chocolate chips...


... chopped macadamia nuts...


...and dried cherries.


Let's just pause for a moment to take it all in.


Now mix it all together well - I prefer to do this by hand to keep everything from breaking up into tiny bits...


... once it's all mixed in, it should look like this:


Cover the dough with saran wrap and chill it for an hour.  Then preheat your oven, prepare your cookie sheets (psst, I recently bought some silicone liners and they are da bomb, I highly recommend springing for a set) and scoop the dough...


... isn't it lovely?

Scoop of Mayhem Chocolate Chip Cookie Dough

Bake them for 8-10 minutes, I've found they take the full 10 minutes in my oven on the pure convection setting since switching to the silicone liners, but I recommend setting your timer for 8 minutes and checking them.  They should be golden brown on the edges and top, but might look slightly wet still.  Let them sit on the sheet for 2 minutes before removing them to wire racks to cool.

Cooling Cookies


Here's the recipe:

Mayhem Chocolate Chip Cookies

1 Cup unsalted butter
3/4 Cup Brown Sugar
3/4 Cup Granulated Sugar
Fresh Baked Cookies2 Eggs
1 tsp Baking Soda
1/2 tsp Salt
2 tsp Rum Emulsion or Rum Extract
2 1/4 Cups Flour
1 - 10 oz bag Dark Chocolate Chips
1 Cup Macadamia Nuts, chopped
1 - 5 oz bag Dried Cherries

Melt butter in a large mixing bowl.  Add in brown and granulated sugars.  Mix well, until fully emulsified.  Allow to cool.  Add eggs, baking soda, salt and rum emulsion (or extract).  Mix well.  Add in flour and top with chocolate chips, nuts and cherries.  Mix well.  Cover and chill for 1 hour.

Preheat oven to 375 degrees.  Prepare cookie sheets with either non-stick spray or silicone baking mats.  Scoop or spoon dough onto baking sheets 12 to a sheet.  Bake 8-10 minutes until light golden brown on edges and top.  Remove from oven and leave cookies on baking sheet for 2 minutes.  Remove to wire racks to finish cooling.

Makes approx 4 dozen depending on size of scoop.

Note: You'll want to have plenty of milk on hand with these babies in the house!


Sunday, March 20, 2016

Tutorial: Hiking Boot Cookies


Today is the first day of Spring - HOORAY!  That means hiking season is almost upon us.  To get your ramped up for the season, I wanted to share this tutorial with you for Hiking Boot Cookies.

Last July, my sister got married.  She and her new hubby started out their relationship hiking together and it grew from there so when they planned their wedding, they planned a casual, hiking themed wedding that was as much fun for the guests as it was for them.  It was very laid back and casual (and it was held on what turned out to be the hottest day of the summer - yikes!) and the menu was no different.

They picked a casual menu and asked me to oversee the shopping, cooking and preparing of the food, which included a special request for a platter of hiking themed cookies.  Here's what they looked like:


I decided to use Lila Loa's End All for Chocolate Cookies Recipe for a couple of reasons.
1) the chocolate cookie would show through on the boot-print scene cookie and look like earth, adding to the overall effect
2) They are absolutely the best, most reliable cut-out cookie recipe I have ever used - these cookies DO NOT SPREAD when you bake them - which makes them perfect for cut-outs

For the Royal Icing, I always use this recipe from The Sweet Adventures of Sugarbelle.  I've found it to be a reliable recipe and tastier than most Royal Icing recipes I've had.  You can also find lots of tutorials and excellent tips on this blog, and I highly recommend it if Royal Icing Cookies are something you enjoy playing with.

I had no trouble finding a basic idea for the backpack and bootprint cookies, but I had no luck finding anything for the hiking boot.  So, I figured it out for myself and took pictures of every step (ha ha, see what I did there?), so I could share them here...

Once you have cut and baked your roll out cookies, allow them to cool completely.  Still-warm cookies will result in runny frosting - a disaster for this type of decorating.


I mixed up a dark gray Royal Icing and thinned it to a 20 second consistency.  This is just thick enough to hold a line, but thin enough to use as a flood icing to fill in the outlines. I started with the bottom of the sole...


...while that was drying, I added the upper edge that you see on so many pairs of hiking boots...


...and while those details were drying (and while I was adding details to some of the other cookie shapes that used this same color), I mixed up a light tan color, which I also thinned to a 20 second consistency.  I sealed it up and let the other details set before filling in a flooding the body of the boot while the body of the boot was still try I thinned the grey icing even more - to about a 10 second consistency (maybe less) and added the eyelets to the boots, using a small round tip, and just dropping a tiny dot of icing in a row.  This results in the added icing sinking into the icing that's already there, while still holding it's shape.


Now I used the Royal Icing straight up, with just coloring to add the lacing...


On one cookie, I also added their initials and the date of the Big Day to place on the top of the cookie platter.


And there you have it, Hiking Boot Cookies for a Hiking or Camping themed cookie platter!


Saturday, February 6, 2016

Twisted Chocolate Chip Cookies


Chocolate Chip Cookies are the hands-down favorite in my house.  If I ask my husband what kind of cookies he'd like me to make, he'll always request Chocolate Chip.  Its my favorite to bake and experiment with too.  I love to change up the extracts and stir-ins I use and Twisted Chocolate Chip is not only one of my favorite variations, but it's also my go-to choice any time I make cookies for people who don't eat nuts.

What makes these Twisted Chocolate Chips twisted is the addition of pretzel twists.  I love how the crunchy texture of the pretzels holds up in the cookie dough and ads a similar texture to nuts with the addition of that touch of saltiness.  I love my sweet with a little salty crunch!

I start these cookies by melting the butter and creaming the melted butter with the granulated and brown sugars.


I've found that the to achieving a lofty, chewy cookie when using melted butter is to beat the melted butter and sugar together until you have a truly emulsified mixture.  If you can still see the liquid butter at the edges of your bowl - it's still separating from the sugar and you need to keep mixing.  I use a whisk for this whole process...  

...see the separation here...


...and fully emulsified here:


Once the sugar and butter is completely blended together, set it aside to cool a bit while you break up the pretzel twists.  I prefer the twist to pretzel sticks, they just seem to blend into the dough a bit better.  I also like to break them up by hand, you want coarse chunks of pretzel, not tiny crushed up bits that disappear into the dough.  They should look like this:


The sugar and butter emulsion should be cooled enough at this point to add the eggs, mix them in well, then add the baking soda, salt and vanilla.  Blend well.


Add the flour and top the flour with the pretzel pieces and chocolate chips.  Stir it all in until the flour disappears into the dough.  I do it this way because I've found it helps to suspend the chocolate chips and other stirred in additions in the dough - so you get a nice, even distribution of ingredients in every bite. 


The cookie dough will be sticky and a bit too loose to scoop at this point.  


Cover it tightly with plastic wrap and chill it for 1 hour.  Then preheat the oven to 375, prep your cookie sheets with either non-stick spray, silicon baking mats or parchment paper.  Scoop the cookies and place on the prepared sheets about 1-2 inches apart.  I use a scoop that allows me to fit 12 to a sheet and makes standard sized cookies, but feel free to use whatever size you prefer.


Bake at 375 degrees for 8-10 minutes.  Allow cookies to set on the cookie sheet for 2 minutes, then transfer to wire racks to finish cooling.  We like to have a few while they are still warm, fresh from the oven - preferably with a cold glass of milk.


Twisted Chocolate Chip Cookies

1 cup unsalted butter, melted 
3/4 cup granulated sugar
3/4 cup light brown sugar
2 eggs
1 tsp baking soda
1/2 tsp salt
2 tsp vanilla extract
2 1/4 cup flour
1 cup pretzel twists, coarsely broken
2 cups semi-sweet chocolate chips

Melt butter in the microwave on high for about 1 minute.  Add granulated and brown sugars and mix well, until completely emulsified.  Set aside to cool.  Add eggs and blend well.  Add baking soda, salt and vanilla and stir to mix.  Add flour, pretzels and chocolate chips.  Stir in and mix until all the flour is fully incorporated into the dough.  Chill for 1 hour.

Preheat oven to 375 degrees.  Spray cookie sheets with non-stick spray or line with silicon baking mats or parchment.  Use a cookie scoop or a spoon to drop cookies onto sheet 1-2 inches apart.  Bake 8-10 minutes until golden brown.  Remove from oven and allow cookies to set for 2 minutes, then transfer to a wire rack to finish cooling.

This recipes makes about 3 1/2 dozen cookies using a 2 tablespoon scoop.